Friday, March 15, 2019

2 Resources That Will Make You Love Coding in Math Class

      If you've been afraid to give coding a chance in your math classroom, I'm here to tell you about a couple of my favorite activities that will convince you that it is time to give it a try.  They are easy to implement (even if you have NO experience), and you'll be excited about the math that is involved!

Student use coding resources in middle school math class

  My journey with coding began a few summers ago.  On a whim, I decided to try the "Summer of Code" on Khan Academy.  I had always heard that math skills were needed for computer fields, but I really didn't know what kind of math was needed for computer programming.  That summer I spent quite a bit of time completing the Beginners JavaScript course on Khan Academy, and I loved it!  I'm still no expert, but after that summer I started a Coding Club at my school.  It turns out there IS tons of math involved in coding....and lots of it even relates to what is taught in middle school.

        You may not be ready to take on an entire JavaScript course, but there are lots of great resources out there to introduce kids to coding.  In this post, I want to highlight my two favorite coding options.  They are both great for a beginner skill level yet can challenge those with more experience.  As a bonus, both resources do a great job of showing some of the connection between math and coding. 

     Code.org has lots of great resources that are perfect for people with no coding experience...both kids and adults.  If you don't have any coding experience, the Hour of Code activities from Code.org are a great place to start.  These activities are user-friendly and high interest.  Code.org has a wide variety of quick coding activities to choose from, and they have all kinds of themes that are fun for kids. 

       My favorite is their Frozen themed Hour of Code activity.  It has tons of math involved in the coding and it's so fun!  This series of 20 puzzles starts out with some relatively simple puzzles, creating a series of lines that turn into a square.  The challenges get more and more complex as you begin to write code to form a series of squares that rotate to form a pattern.  This is a great activity if you are studying angles, and your artistic kids will love it too!  I had my 7th graders try this as enrichment as part of our Shapes and Designs unit (focusing on interior and exterior angles, angle sums of polygons) and it kept them involved and challenged!  These activities use blocks that you drag and drop in place...easy peasy!

       My other favorite resource for a beginning coding activity is Khan Academy's beginner's Hour of Code activity.   I love these Khan Academy resources.  The teaching videos are easy to understand and interactive.  While the Hour of Code activities from Code.org use drag and drop blocks, Khan Academy actually has students type in the code.  I've had students tell me how "smart" they felt when they were typing in their lines of code.  This set of JavaScript challenges will give your students a taste of coding as well as some of the math that is used in coding as students create simple drawings using code. Students really get a feel for how geometric figures are used in coding, as well as how it relates to the coordinate plane.  If you like this Hour of Code activity, the full Intro to JavaScript course on Khan Academy is great as well (although probably not something you will have time to tackle in math class)!
Coding resources for beginners in your middle school math class


       If you don't have any experience with coding, now is the time to give it a try!  These two activities may be just what you need to convince you that there may just be a place for coding in your math classroom.  Leave a comment below with your favorite coding resource.


Saturday, February 16, 2019

My Best Response to "I Don't Get It"

    "I don't get it."
    "Which part?"
    "All of it!"

    Is it just me, or does this happen in your classroom as well?  What is your response to this statement?

Students need to learn to ask the right question when they are confused in a middle school math classroom.


      I used to get so frustrated that my students couldn't tell me where their understanding started to fall apart when they were struggling to understand something.   I often felt like they were copping out, and that they just needed to try harder to ask better questions.

     My new approach is to explain to students what happens when they say I don't know.  What I tell my students is that when they say I don't know, my "teacher brain" goes into overdrive.  I immediately begin wondering what they didn't understand.  For example, if we are working on proportional relationships on a graph, is the problem that you don't know the difference between the x and y-axis?  Are you confused about where you should start when you plot a point?  Are you unsure how to plot a point with a decimal in it?  Are you having trouble with how to number the axes?  When I start to name off all of the possible questions a student might have, I see my students begin to understand why I don't want them to just say, "I don't get it".

      Now that students understand everything that is going on in my head, I lay out the reality for them.  If I think of 10 different problems they might be having, and if they give me more information about what they don't understand. then the odds are certainly not in their favor!  As I tell them, when I'm guessing, there's only a small chance that my answer will be the one that they need.  As I tell them, if you want the right answer that can help you, then you have to help me understand what your question is.

       This has really helped my students see that when I tell them not to just say, "I don't get it", I'm not being mean but that I'm really trying to help them actually get their question answered.  Usually now when someone tells me that they don't get it, I mention just one or two of the questions that my "teacher brain" is wondering about and they are able to tell me what the problem is.

My best response for students who say "I don't get it" in  my middle school math classroom.


What is your best strategy for responding to "I don't get it?"  Leave it in the comments below.

Thursday, January 3, 2019

The Most Awesome Linear Regression Project Your Class Will Love

  Does your class love Kahoot as much as my class does?  Because they REALLY love Kahoot.  During our unit on linear equations, I decided to have my class use linear regression to try to figure out the Kahoot algorithm for assigning points as our final project.

Kahoot games make a fun linear regression project

    As our discussions of Kahoot scoring began, it was clear to everyone that the two variables that impact your score are time to answer and answer streaks.  Trying to figure out how both of these variables affected your score was the foundation of our project. 

       The first thing we had to do was find a way to collect data about these variables.  My teacher's brain went into overdrive trying to figure out exactly how we could collect the data so that my students would have data to analyze.  However, rather than just organizing the data collection myself, we started the project by having a class discussion about how to collect meaningful data relating how time impacts your score in Kahoot.  I felt like having students think through the process of how to collect meaningful, useful data was very important.  I was so excited that the plan the kids came up with was basically the same thing I had planned to do. 

Picture of chalkboard with plans to collect data for algebra project.

       Here was the plan:  Each student would be assigned a specific time at which they were supposed to answer.   Students would answer at the specified time and record how many points they received on that particular question (rather than their overall score).  The class decided that after each correct answer, you had to miss the next question so that no one had an answer streak that would impact their score.   We played through the Kahoot a few times with different time limits on the questions.  Throughout the data collection process, we used the same Kahoot.  It was a 10 question Kahoot in which every question was 1 + 1, and the right answer was always in the same place. 

        Next, we collected data about answer streaks.   This time, the entire class answered at the same time but each student had a different amount of questions they were supposed to get correct.  Once I had collected all of the time and answer streak data, I transferred it over to Google Sheets so that I could easily share it with students.  Now we were ready to get to work on our linear regression project.

       The project had several parts for students to complete: 

  • Data table and graph with at least 8 points relating time and score 
  • Linear regression equation relating time and score.  Students had to explain the m and b value within the context of a Kahoot game, as well as explain what the r value meant
  • Data table and graph with at least 6 points relating answer streak and score
  • Linear regression equation relating streak and score.  Students again had to explain the m and b values within the context of a Kahoot game and explain the r value.  In addition, students had to explain any limits to the domain (because the streak bonus eventually maxes out)
  • A predicted score on a fake Kahoot game compared to the actual score--This was my favorite part of the project.  Students had to use their equations to predict their score on an 8 question Kahoot.  They had to specify when they would answer and if they would get it right or wrong.  Then we actually played the Kahoot so they could see how well the equations worked.  It was a lot of fun to hear, "My prediction was only 5 points off!" and the rest of their excitement!
  • A letter explaining what the student liked about the Kahoot scoring algorithm or a suggestion to change it for the better
Samples equations and graphs for the Algebra Linear Regression Project.


       Overall, I really liked this project much better than using fake linear regression data from our textbook.  If I had to do it over again, I would probably only focus the project on the time aspect and not worry about answer streaks.  Having two sets of data definitely complicated things.  Overall, this was a fun project for my linear equations unit.

Graphs and Kahoots combine in this free algebra project.


       If you'd like a copy of this project, click here to join my email list and you'll get access to this project.

Monday, November 26, 2018

How To Get Your Students Excited About Similarity

       Our current unit is Stretching and Shrinking, a unit about mathematical similarity.  This is one of my favorite units to teach every year, and this year I found a great way to launch it.  I decided that to launch our unit, we would have some class "grow beasts".  I am so excited about how this class activity turned out.  There were lots of great benefits for my student's learning, and it was pretty easy to implement.

Students measuring a variety of growing toys to investigate similarity in your middle school math classroom.


       First, I'll talk about the implementation.  I had 7 different grow beasts:  2 frogs, 2 lizards, 2 skeletons and 1 shark.  Each table was assigned one of the grow beasts.  On day 1, we defined what measurements we would be taking each day.  I had a simple chart that defined measurement 1, 2, 3, 4 and 5 for each grow beast.  Students took initial measurements of their beasts.  I had students submit their measurements through a very simple Google form.  I also made initial measurements of each of the different types of grow beasts.  We also examined the claims on the package (I hung them on the wall as reference), which included the following claims:

Each package made a different claim about how the beasts would grow in this middle school math project.

       The next day, we organized all of the data and looked for outliers.  For each measurement that didn't make sense, we decided what to do about it.  In a few cases, we threw the data out that clearly seemed incorrect.  In a few cases, the decision of the class was that the measurement had accidentally been taken in centimeters instead of millimeters, in which case we fixed it.  We also made predictions of what we thought would happen.  This was a great chance for me to begin to understand my students thinking before we started our unit.  I tried to focus our discussion on key issues relating to similarity, such as whether all parts of the body would grow equally, and whether the angles in the figures (such as the angles of the legs in the frog) would stay the same or change as the beast grew. Student response was mixed on these issues, so the discussion was very eye-opening for me.  It gave me a good window into my students' initial thinking about similarity.  I also had students make predictions about what would be the size of each of the measurements if they all doubled, or if they all tripled.  At the end of the day, I put the grow beasts in water.

      I also made a graph with all of the initial measurements, as well as a line showing the measurements for growing 3 x bigger and growing 6 x bigger.  I had original measurements as my x variable and growing measurements as my y variable.  I started by putting all of the original measurements on the x-axis.  I made it on a big sheet of chart paper.  This graph became a central place for me record all of the results and became the guide for many of our discussions.  I was so glad to have this graph to refer to throughout our grow beast project.  I also really liked that it was a great way to introduce the concept of proportionality, although we didn't formally use that language.  For someone teaching 8th grade or Algebra, this might also be an interesting way to look at trend lines.  I definitely found that each day's data made a somewhat linear pattern on the graph, although measurement accuracy (or lack of) might be a problem.  You could also use Desmos to graph your data.

A coordinate graph of the growth of the beasts over time for this middle school math similarity project.


       Our warm-up each day was to measure the grow beasts.  I usually gave them the first 5 minutes of class to get their measurements submitted.  If you're going to do this, you'll want to make sure that you have a towel around to dry off the beasts before you measure them.  The kids got really excited to see how they grew.  Each day I would put up the chart that listed the different measurements, and the kids continued to complete the same Google Form over and over with the measurements for the grow beast.  This project definitely reminded me that having students measure is so important, and they REALLY need the practice!  I also liked having students give the data via the Google Form.  It allowed me to easily sort the data by the animal type, and then by date so we could really see the trends in growth.

       At the end of each day, I also measured the grow beasts and add the new data to the class graph.  I had each figure color coded on the graph, but it was really cool to see how you could see a trendline of growth for all of the figures.  I loved the fact that I had already put the tripling line and 6 x bigger line on the graph, so when I showed it to the kids we could compare it to those benchmarks.


       One interesting (and fortunate) thing that happened to me was that one of my frog grow beasts did not grow for some reason. That group of students was kind of bummed out, but as a teacher it was terrific!  We had initially debated whether the angles of the legs would stay the same, and this way we actually were able to check it out.  If you plan to do this project, if possible, you might get one grow beast that doesn't go in the water to compare back to.

       Comparing two frog grows beasts: one the original size and one bigger.    The grow beasts grew very large in the water.

       We let our grow beasts grow until they stopped.  For us, that was about 7 days.  They were close to triple in size, but none of them quite made it.  This did make a great impression on my class.  It also sparked a fantastic discussion about mathematical similarity.  By the time we finished the project, I had introduced 2-D similarity (Wumps, for you all CMP users!) and we had a great discussion of what the grow beasts had to do with Wumps and everything that we had learned about the characteristics of similar figures.

Compare the size of the original frog and the bigger frog using graphs in this middle school math similarity project.

If you're interested in joining my mailing list for more tips and freebies, click here!


Monday, November 5, 2018

5 Expert Activities for Teaching Surface Area

       Surface area and volume can be so confusing for kids, but this year I set of activities that really helped my students understand these concepts.  When I gave my kids a quiz over surface area and volume (mostly of rectangular prisms), they really did a fantastic job!  Here's what I did. 

  • Activity 1:  The first activity had students build arrangements of rectangular prisms using 12 interlocking cubes.  Then they had to make a net for at least one of the rectangular prisms.  I really think this was an important place to start.  6th grade standards expect students to learn about finding surface areas from nets, but I know that my students needed to review this foundational skill.  This activity was a good place to start, but I also know that I didn't want to spend toooo much time having students build prisms.  Let's face it, after a day, I was already tired of telling my kiddos to stop building everything else but rectangular prisms.   
    In this volume and surface area activity, students used blocks to build a prism and then made a net for it.

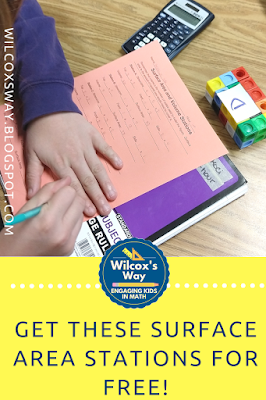
  • Activity 2:  I think the next activity that I did was the key to my kids understanding surface area and volume so well this year.  I made up rectangular prisms of varying sizes and set them up at stations around the room.  For each station, I had students list out the following information:
    • Dimensions of the prism
    • Dimensions of top
    • Dimensions of front
    • Dimensions of side
    • Total volume (which I described as the number of cubes needed to build the figure)
    • Total surface area (which I described as the number of stickers needed to cover the stickers)  
      Students working with rectangular prisms to find surface area and volume.
This truly was class time well spent.  Students really began to understand how surface area and volume were different and started to understand how to find the surface area.  At the end of this day of stations, I showed students the formulas for volume and surface area of rectangular prisms, and they really made sense to them!  Click here or the picture above to get a copy of these stations!

  • Activity 3: The next activity that we did was a card sorting activity where students had to match 6 different types of cards:  picture of the prism with lines, a picture of the prism without lines, dimensions, net of the figure, volume calculations, and surface area calculations.  The card sorting activity, as well as the activity described in activity 1, are available in my Teacher's Pay Teachers store.     
    Card sort with cards containing volume, dimensions, surface area, and nets.
  •  At this point, my kids understand the concepts pretty well and they just needed PRACTICE!  So we spent half of a class one day practicing, and that did wonders.  
  • Activity 4:  Next, it was time to work on triangular prisms.  I started by giving kids a worksheet of triangular prisms that were made on graph paper.  I thought it was important to start this way because it gave students a chance to see how to make the prism and see the measurements. This only took about 15 minutes, so I was able to combine activities 4 and 5 into one day in class.
  • Activity 5:  Next, we moved on to nets of triangular prisms, but ones that listed measurements instead of showing the net on graph paper.  Then we practiced drawing each of these figures as they would look when they were folded up.  With each one, we talked about each of the sides of the net and where it would be on the 3-D version.  I think this really helped my students be able to break down a 3-D figure into its parts.  In fact, on my quiz, I saw some students redrawing the 3-D triangular prisms into nets.

       At this point, I gave a quiz that had surface area and volume of rectangular prisms and surface area of triangular prisms.....and the kids TOTALLY rocked it!  It was a quiz that was actually fun to grade because even my often struggling students were doing really well.  Yay!!!

      For my class, the next step is an activity to help students generalize the volume formula.  I look forward to planning this, but at this point, I'm feeling super excited about the progress we have made so far.


Sunday, September 16, 2018

Why Desmos Is My Favorite Technology Tool

      Earlier this year, I started writing about some of my favorite technology tools, and I've even written about Desmos as one of those tools.  But I'm here today to tell you even more about how much I love Desmos!  Previously I wrote about how much I love the teaching activities part of Desmos, but my love of Desmos started with the graphing calculator part of Desmos. Here are a few of the features that I love on the graphing calculator side of Desmos.

1.  Linear regression
I can't even begin to tell you how much easier it is to use Desmos than a regular graphing calculator.  I teach one section of Integrated Math 1, and I always used to completely DREAD the lessons on linear regression.  You know, like, give me a stomachache and make me not want to get out of bed that morning kind of dread. I would spend forever the day before making sure that every graphing calculator was working and had all the right settings....and it never mattered.  I would still spend the entire hour running around, fixing settings and putting aside the calculators that I couldn't figure out what was wrong.

But not with Desmos.  With Desmos it's soooooo easy!  No settings to worry about, much easier to enter data.  It's just EASY!  Plus, they have a super easy tutorial.  You just need to click on the question mark in the upper right-hand corner, and the tour to show you how to do regression is right there.

Desmos has tours set up to help you if you click the question mark in the upper right hand corner.


2.  Create tables and graphs I can screenshot to use in other things
When I'm making a test or activity for class, I often find myself using Desmos and taking a screenshot.  Easy peasy!

3.  Label axes and zoom in and out on your graph
This is kind of a subpoint from above, but I have recently discovered that you can label the axes on your Desmos graph. Plus you can easily zoom in or out depending on the view you want to see of your graph.   Makes it even better!

If you click in the upper right hand corner of your Desmos graph, you can access graph settings.


4.  Export and share your graphs 
This is also useful in addition to taking a screenshot.  I find that the lines are a little bit darker than a screenshot, so sometimes I prefer this method.

In addition, you can also share a graph this way.  For example, if you had created a graph that you already set up some of the labels or axes for your students, you could share it with them.


If you click the share arrow in the upper right hand corner, you can export your graph.


5.  You can add photos to the background of your graph.
This is a great way to incorporate real-life situations and help students connect them to the real world.


You can insert pictures of real life objects such as a roller coaster into the background of your graph.


6.  Students can easily graph systems of equations and see the point of intersection with accuracy to the nearest tenth.
Last year, I was teaching a lesson from one of my favorite units, Moving Straight Ahead.  This is a unit about linear relationships, and we were working on the Henri and Emile problem.  This is a problem about two brothers who are racing.  They have different speeds, and the older brother gives the younger brother a head start.  Students are supposed to decide how long the race will be so that the younger brother wins a close race.
Most of my students solve this using a table or guess and check.  I was so excited to watch one group of students decide to use Desmos to solve the problem.  They graphed the equation of each brother and could clearly see the point of intersection (where the brothers are tied).  I thought it was absolutely amazing that students saw the technology of Desmos as a tool to help solve the problem, and understood how to use it and how to interpret the answer.  The rest of the class was so impressed with this solution....and wished they had thought to use it! 


You can see the coordinates of the point of intersection.


7.   Add sliders to let students play around with concepts of slope and y-intercept.
This is such an easy way for students to play around with what happens to your line as you change elements of the equation, without having to graph everything by hand.  It helps students to see the big picture and analyze patterns.


If you haven't yet, it's time to give Desmos a try!  Leave a comment telling me your favorite feature of Desmos!


Saturday, August 11, 2018

Expert Teacher Tips for STEM Challenge Success

       Hopefully, after my last post you're excited to try a STEM challenge in your math classroom.....but maybe you're still a little nervous?  Have no fear!  Here are my top tips for successfully implementing STEM challenges in your classroom.

1.  Try it yourself first
I know you may not be that excited about building a house from marshmallows and toothpicks or whatever the challenge is, but it really is helpful in many ways.  It helps you understand different routes that students may take (although you'll still have students surprise you with something you didn't think of).  You will also better understand what roadblocks students might hit, giving you a better idea of how to help them get "unstuck" without giving away too much.  I also think it is great to build rapport with students, as you can commiserate with them about the problems you had.  And maybe, just maybe, you'll have some fun once you get started!   My son and I have had quite a bit of fun trying out my STEM ideas!

A boy trying to build a structure out of toothpicks and candy in a STEM challenge.


2.  Consider materials carefully
This can be a helpful consideration both in choosing the STEM challenge, as well as how you implement it.  Before you choose a STEM challenge, carefully consider the materials.  If the materials don't seem like a good fit for your class, keep looking for a different challenge.  You might also consider what materials you want to make available.  For many STEM challenges, students are allowed to choose materials, so look over that supply list with a critical eye.  Make thoughtful decisions about materials you don't want to use, or additional materials you want to make available.  Here are some of the factors that affect my materials choice:

  • Are they affordable in the amount I will need?
  • Are the materials easy to find?  
  • Are they easy to store after finished?  
  • Can I save the extras for later use?
  • Can my students handle using them appropriately?
  • Am I going to be left with a mess?
Carefully consider materials when implementing a STEM challenge


3.  Consider materials distribution carefully 
Make sure you think this through before you start.  Disorganized materials distribution can sour the whole experience for you, so take the time to plan this carefully so it won't drive you crazy.
  • Are you going to give all students a set of the exact same materials?  
  • Are you going to set out the materials and give students free access?  
  • Will there be one person in the group that is in charge of getting materials for the group?  
  • If students have extra materials, should they return them immediately or at the end of the challenge?  
  • Can students get materials whenever they are ready, or will you call groups to get materials one at a time?
4.  Consider group size carefully
There is no perfect group size for STEM challenges.  The perfect size depends on what students are being asked to do.  Think carefully about how many students can be actively involved in the challenge.  The perfect group size for STEM challenges (and almost anything!) is one where you have enough people to do the work and get ideas, but not so many that people get uninvolved.  One of my STEM challenges involves students building a scoop for cereal.  For this one, I like to use pairs.   Two people are plenty to design a scoop and measure the contents.  For a different STEM challenge where students are building a pool large enough to land a high diver, I like larger groups.  There is more to do during testing, so larger groups make more sense.


5.  Consider the best timing to incorporate any math you want to work into the challenge
If part of your purpose for the STEM challenge is for students to incorporate a math concept, think carefully about whether it will be more effective before or after the challenge.  For one STEM challenge that I did, students had to build a structure that had a base with a particular area.  In that case, it was important that students had a strong foundation regarding square inches and area before they started.  In another case, students were graphing inequalities on a number (showing that all acceptable results were below a particular value).  In this instance, I chose to teach graphing inequalities on a number line after we did the STEM challenge, as I felt that students would have greater buy-in with their own data to use.  

6.  Decide in advance how you will hold students accountable
Personally, I like to begin and end every STEM challenge with students working individually.  After I pose a STEM challenge, I always give students a few minutes to write down their thoughts about the challenge before they begin work with their group.  This holds students accountable, but also means that when groups begin working together, every student should have ideas to contribute.  I end every STEM challenge with students reflecting about the how successful their group was and how well they worked together.  Your accountability may look different, but I would definitely encourage you to have each student be responsible for something on their own.

7.  Decide what you want students to do when they finish
Your classroom is going to be a busy place, and the last thing you need is groups of students wandering around, messing with students that are still working.  Make sure that students know what to do when they are done.  This is a great time for students to reflect on their group work, or to do some math that goes along with their challenge.  You will also want to make sure that students take time to clean up their area.

Tips for Success with STEM Challenges are given in this post.


8.  Accept that your classroom is going to be louder than normal when you do a STEM challenge
If you know to expect this, it is a little easier to accept.  For me, I have grown to love this aspect of STEM challenges (within reason 🙂).  I love to hear the excitement in my students' voices as they explain to a group member their idea.  I love to hear their cheers when they finally get something to work after many tries.  I love that students are having fun and learning, so I have learned to accept the noise!

tips for successful stem challenges


Now that you have this information, I encourage you to give STEM challenges a try.  Comment below and tell what you tried and how it went.