Monday, November 26, 2018

How To Get Your Students Excited About Similarity

       Our current unit is Stretching and Shrinking, a unit about mathematical similarity.  This is one of my favorite units to teach every year, and this year I found a great way to launch it.  I decided that to launch our unit, we would have some class "grow beasts".  I am so excited about how this class activity turned out.  There were lots of great benefits for my student's learning, and it was pretty easy to implement.

Students measuring a variety of growing toys to investigate similarity in your middle school math classroom.


       First, I'll talk about the implementation.  I had 7 different grow beasts:  2 frogs, 2 lizards, 2 skeletons and 1 shark.  Each table was assigned one of the grow beasts.  On day 1, we defined what measurements we would be taking each day.  I had a simple chart that defined measurement 1, 2, 3, 4 and 5 for each grow beast.  Students took initial measurements of their beasts.  I had students submit their measurements through a very simple Google form.  I also made initial measurements of each of the different types of grow beasts.  We also examined the claims on the package (I hung them on the wall as reference), which included the following claims:

Each package made a different claim about how the beasts would grow in this middle school math project.

       The next day, we organized all of the data and looked for outliers.  For each measurement that didn't make sense, we decided what to do about it.  In a few cases, we threw the data out that clearly seemed incorrect.  In a few cases, the decision of the class was that the measurement had accidentally been taken in centimeters instead of millimeters, in which case we fixed it.  We also made predictions of what we thought would happen.  This was a great chance for me to begin to understand my students thinking before we started our unit.  I tried to focus our discussion on key issues relating to similarity, such as whether all parts of the body would grow equally, and whether the angles in the figures (such as the angles of the legs in the frog) would stay the same or change as the beast grew. Student response was mixed on these issues, so the discussion was very eye-opening for me.  It gave me a good window into my students' initial thinking about similarity.  I also had students make predictions about what would be the size of each of the measurements if they all doubled, or if they all tripled.  At the end of the day, I put the grow beasts in water.

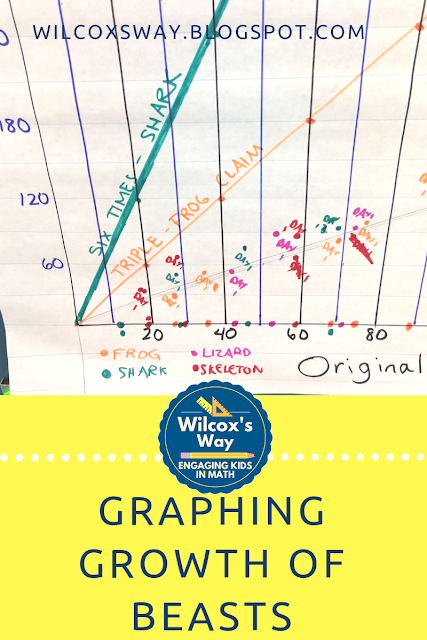
      I also made a graph with all of the initial measurements, as well as a line showing the measurements for growing 3 x bigger and growing 6 x bigger.  I had original measurements as my x variable and growing measurements as my y variable.  I started by putting all of the original measurements on the x-axis.  I made it on a big sheet of chart paper.  This graph became a central place for me record all of the results and became the guide for many of our discussions.  I was so glad to have this graph to refer to throughout our grow beast project.  I also really liked that it was a great way to introduce the concept of proportionality, although we didn't formally use that language.  For someone teaching 8th grade or Algebra, this might also be an interesting way to look at trend lines.  I definitely found that each day's data made a somewhat linear pattern on the graph, although measurement accuracy (or lack of) might be a problem.  You could also use Desmos to graph your data.

A coordinate graph of the growth of the beasts over time for this middle school math similarity project.


       Our warm-up each day was to measure the grow beasts.  I usually gave them the first 5 minutes of class to get their measurements submitted.  If you're going to do this, you'll want to make sure that you have a towel around to dry off the beasts before you measure them.  The kids got really excited to see how they grew.  Each day I would put up the chart that listed the different measurements, and the kids continued to complete the same Google Form over and over with the measurements for the grow beast.  This project definitely reminded me that having students measure is so important, and they REALLY need the practice!  I also liked having students give the data via the Google Form.  It allowed me to easily sort the data by the animal type, and then by date so we could really see the trends in growth.

       At the end of each day, I also measured the grow beasts and add the new data to the class graph.  I had each figure color coded on the graph, but it was really cool to see how you could see a trendline of growth for all of the figures.  I loved the fact that I had already put the tripling line and 6 x bigger line on the graph, so when I showed it to the kids we could compare it to those benchmarks.


       One interesting (and fortunate) thing that happened to me was that one of my frog grow beasts did not grow for some reason. That group of students was kind of bummed out, but as a teacher it was terrific!  We had initially debated whether the angles of the legs would stay the same, and this way we actually were able to check it out.  If you plan to do this project, if possible, you might get one grow beast that doesn't go in the water to compare back to.

       Comparing two frog grows beasts: one the original size and one bigger.    The grow beasts grew very large in the water.

       We let our grow beasts grow until they stopped.  For us, that was about 7 days.  They were close to triple in size, but none of them quite made it.  This did make a great impression on my class.  It also sparked a fantastic discussion about mathematical similarity.  By the time we finished the project, I had introduced 2-D similarity (Wumps, for you all CMP users!) and we had a great discussion of what the grow beasts had to do with Wumps and everything that we had learned about the characteristics of similar figures.

Compare the size of the original frog and the bigger frog using graphs in this middle school math similarity project.

If you're interested in joining my mailing list for more tips and freebies, click here!


Monday, November 5, 2018

5 Expert Activities for Teaching Surface Area

       Surface area and volume can be so confusing for kids, but this year I set of activities that really helped my students understand these concepts.  When I gave my kids a quiz over surface area and volume (mostly of rectangular prisms), they really did a fantastic job!  Here's what I did. 

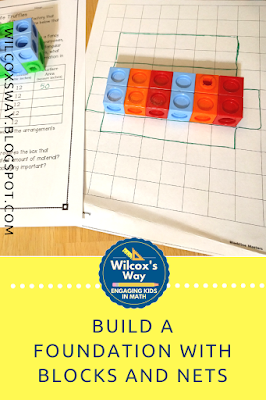
  • Activity 1:  The first activity had students build arrangements of rectangular prisms using 12 interlocking cubes.  Then they had to make a net for at least one of the rectangular prisms.  I really think this was an important place to start.  6th grade standards expect students to learn about finding surface areas from nets, but I know that my students needed to review this foundational skill.  This activity was a good place to start, but I also know that I didn't want to spend toooo much time having students build prisms.  Let's face it, after a day, I was already tired of telling my kiddos to stop building everything else but rectangular prisms.   
    In this volume and surface area activity, students used blocks to build a prism and then made a net for it.

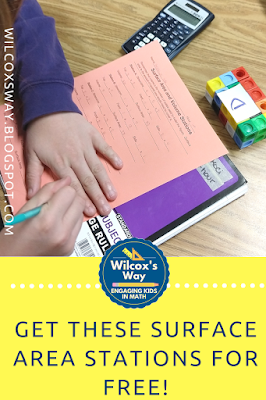
  • Activity 2:  I think the next activity that I did was the key to my kids understanding surface area and volume so well this year.  I made up rectangular prisms of varying sizes and set them up at stations around the room.  For each station, I had students list out the following information:
    • Dimensions of the prism
    • Dimensions of top
    • Dimensions of front
    • Dimensions of side
    • Total volume (which I described as the number of cubes needed to build the figure)
    • Total surface area (which I described as the number of stickers needed to cover the stickers)  
      Students working with rectangular prisms to find surface area and volume.
This truly was class time well spent.  Students really began to understand how surface area and volume were different and started to understand how to find the surface area.  At the end of this day of stations, I showed students the formulas for volume and surface area of rectangular prisms, and they really made sense to them!  Click here or the picture above to get a copy of these stations!

  • Activity 3: The next activity that we did was a card sorting activity where students had to match 6 different types of cards:  picture of the prism with lines, a picture of the prism without lines, dimensions, net of the figure, volume calculations, and surface area calculations.  The card sorting activity, as well as the activity described in activity 1, are available in my Teacher's Pay Teachers store.     
    Card sort with cards containing volume, dimensions, surface area, and nets.
  •  At this point, my kids understand the concepts pretty well and they just needed PRACTICE!  So we spent half of a class one day practicing, and that did wonders.  
  • Activity 4:  Next, it was time to work on triangular prisms.  I started by giving kids a worksheet of triangular prisms that were made on graph paper.  I thought it was important to start this way because it gave students a chance to see how to make the prism and see the measurements. This only took about 15 minutes, so I was able to combine activities 4 and 5 into one day in class.
  • Activity 5:  Next, we moved on to nets of triangular prisms, but ones that listed measurements instead of showing the net on graph paper.  Then we practiced drawing each of these figures as they would look when they were folded up.  With each one, we talked about each of the sides of the net and where it would be on the 3-D version.  I think this really helped my students be able to break down a 3-D figure into its parts.  In fact, on my quiz, I saw some students redrawing the 3-D triangular prisms into nets.

       At this point, I gave a quiz that had surface area and volume of rectangular prisms and surface area of triangular prisms.....and the kids TOTALLY rocked it!  It was a quiz that was actually fun to grade because even my often struggling students were doing really well.  Yay!!!

      For my class, the next step is an activity to help students generalize the volume formula.  I look forward to planning this, but at this point, I'm feeling super excited about the progress we have made so far.


Sunday, September 16, 2018

Why Desmos Is My Favorite Technology Tool

      Earlier this year, I started writing about some of my favorite technology tools, and I've even written about Desmos as one of those tools.  But I'm here today to tell you even more about how much I love Desmos!  Previously I wrote about how much I love the teaching activities part of Desmos, but my love of Desmos started with the graphing calculator part of Desmos. Here are a few of the features that I love on the graphing calculator side of Desmos.

1.  Linear regression
I can't even begin to tell you how much easier it is to use Desmos than a regular graphing calculator.  I teach one section of Integrated Math 1, and I always used to completely DREAD the lessons on linear regression.  You know, like, give me a stomachache and make me not want to get out of bed that morning kind of dread. I would spend forever the day before making sure that every graphing calculator was working and had all the right settings....and it never mattered.  I would still spend the entire hour running around, fixing settings and putting aside the calculators that I couldn't figure out what was wrong.

But not with Desmos.  With Desmos it's soooooo easy!  No settings to worry about, much easier to enter data.  It's just EASY!  Plus, they have a super easy tutorial.  You just need to click on the question mark in the upper right-hand corner, and the tour to show you how to do regression is right there.

Desmos has tours set up to help you if you click the question mark in the upper right hand corner.


2.  Create tables and graphs I can screenshot to use in other things
When I'm making a test or activity for class, I often find myself using Desmos and taking a screenshot.  Easy peasy!

3.  Label axes and zoom in and out on your graph
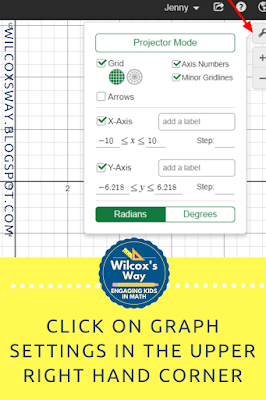
This is kind of a subpoint from above, but I have recently discovered that you can label the axes on your Desmos graph. Plus you can easily zoom in or out depending on the view you want to see of your graph.   Makes it even better!

If you click in the upper right hand corner of your Desmos graph, you can access graph settings.


4.  Export and share your graphs 
This is also useful in addition to taking a screenshot.  I find that the lines are a little bit darker than a screenshot, so sometimes I prefer this method.

In addition, you can also share a graph this way.  For example, if you had created a graph that you already set up some of the labels or axes for your students, you could share it with them.


If you click the share arrow in the upper right hand corner, you can export your graph.


5.  You can add photos to the background of your graph.
This is a great way to incorporate real-life situations and help students connect them to the real world.


You can insert pictures of real life objects such as a roller coaster into the background of your graph.


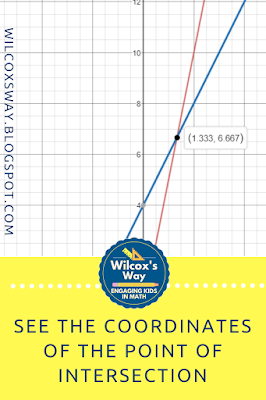
6.  Students can easily graph systems of equations and see the point of intersection with accuracy to the nearest tenth.
Last year, I was teaching a lesson from one of my favorite units, Moving Straight Ahead.  This is a unit about linear relationships, and we were working on the Henri and Emile problem.  This is a problem about two brothers who are racing.  They have different speeds, and the older brother gives the younger brother a head start.  Students are supposed to decide how long the race will be so that the younger brother wins a close race.
Most of my students solve this using a table or guess and check.  I was so excited to watch one group of students decide to use Desmos to solve the problem.  They graphed the equation of each brother and could clearly see the point of intersection (where the brothers are tied).  I thought it was absolutely amazing that students saw the technology of Desmos as a tool to help solve the problem, and understood how to use it and how to interpret the answer.  The rest of the class was so impressed with this solution....and wished they had thought to use it! 


You can see the coordinates of the point of intersection.


7.   Add sliders to let students play around with concepts of slope and y-intercept.
This is such an easy way for students to play around with what happens to your line as you change elements of the equation, without having to graph everything by hand.  It helps students to see the big picture and analyze patterns.


If you haven't yet, it's time to give Desmos a try!  Leave a comment telling me your favorite feature of Desmos!


Saturday, August 11, 2018

Expert Teacher Tips for STEM Challenge Success

       Hopefully, after my last post you're excited to try a STEM challenge in your math classroom.....but maybe you're still a little nervous?  Have no fear!  Here are my top tips for successfully implementing STEM challenges in your classroom.

1.  Try it yourself first
I know you may not be that excited about building a house from marshmallows and toothpicks or whatever the challenge is, but it really is helpful in many ways.  It helps you understand different routes that students may take (although you'll still have students surprise you with something you didn't think of).  You will also better understand what roadblocks students might hit, giving you a better idea of how to help them get "unstuck" without giving away too much.  I also think it is great to build rapport with students, as you can commiserate with them about the problems you had.  And maybe, just maybe, you'll have some fun once you get started!   My son and I have had quite a bit of fun trying out my STEM ideas!

A boy trying to build a structure out of toothpicks and candy in a STEM challenge.


2.  Consider materials carefully
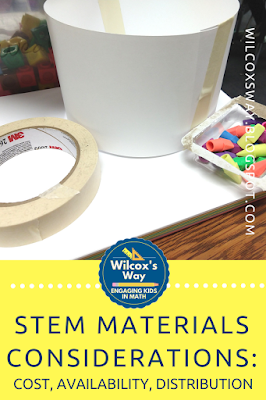
This can be a helpful consideration both in choosing the STEM challenge, as well as how you implement it.  Before you choose a STEM challenge, carefully consider the materials.  If the materials don't seem like a good fit for your class, keep looking for a different challenge.  You might also consider what materials you want to make available.  For many STEM challenges, students are allowed to choose materials, so look over that supply list with a critical eye.  Make thoughtful decisions about materials you don't want to use, or additional materials you want to make available.  Here are some of the factors that affect my materials choice:

  • Are they affordable in the amount I will need?
  • Are the materials easy to find?  
  • Are they easy to store after finished?  
  • Can I save the extras for later use?
  • Can my students handle using them appropriately?
  • Am I going to be left with a mess?
Carefully consider materials when implementing a STEM challenge


3.  Consider materials distribution carefully 
Make sure you think this through before you start.  Disorganized materials distribution can sour the whole experience for you, so take the time to plan this carefully so it won't drive you crazy.
  • Are you going to give all students a set of the exact same materials?  
  • Are you going to set out the materials and give students free access?  
  • Will there be one person in the group that is in charge of getting materials for the group?  
  • If students have extra materials, should they return them immediately or at the end of the challenge?  
  • Can students get materials whenever they are ready, or will you call groups to get materials one at a time?
4.  Consider group size carefully
There is no perfect group size for STEM challenges.  The perfect size depends on what students are being asked to do.  Think carefully about how many students can be actively involved in the challenge.  The perfect group size for STEM challenges (and almost anything!) is one where you have enough people to do the work and get ideas, but not so many that people get uninvolved.  One of my STEM challenges involves students building a scoop for cereal.  For this one, I like to use pairs.   Two people are plenty to design a scoop and measure the contents.  For a different STEM challenge where students are building a pool large enough to land a high diver, I like larger groups.  There is more to do during testing, so larger groups make more sense.


5.  Consider the best timing to incorporate any math you want to work into the challenge
If part of your purpose for the STEM challenge is for students to incorporate a math concept, think carefully about whether it will be more effective before or after the challenge.  For one STEM challenge that I did, students had to build a structure that had a base with a particular area.  In that case, it was important that students had a strong foundation regarding square inches and area before they started.  In another case, students were graphing inequalities on a number (showing that all acceptable results were below a particular value).  In this instance, I chose to teach graphing inequalities on a number line after we did the STEM challenge, as I felt that students would have greater buy-in with their own data to use.  

6.  Decide in advance how you will hold students accountable
Personally, I like to begin and end every STEM challenge with students working individually.  After I pose a STEM challenge, I always give students a few minutes to write down their thoughts about the challenge before they begin work with their group.  This holds students accountable, but also means that when groups begin working together, every student should have ideas to contribute.  I end every STEM challenge with students reflecting about the how successful their group was and how well they worked together.  Your accountability may look different, but I would definitely encourage you to have each student be responsible for something on their own.

7.  Decide what you want students to do when they finish
Your classroom is going to be a busy place, and the last thing you need is groups of students wandering around, messing with students that are still working.  Make sure that students know what to do when they are done.  This is a great time for students to reflect on their group work, or to do some math that goes along with their challenge.  You will also want to make sure that students take time to clean up their area.

Tips for Success with STEM Challenges are given in this post.


8.  Accept that your classroom is going to be louder than normal when you do a STEM challenge
If you know to expect this, it is a little easier to accept.  For me, I have grown to love this aspect of STEM challenges (within reason 🙂).  I love to hear the excitement in my students' voices as they explain to a group member their idea.  I love to hear their cheers when they finally get something to work after many tries.  I love that students are having fun and learning, so I have learned to accept the noise!

tips for successful stem challenges


Now that you have this information, I encourage you to give STEM challenges a try.  Comment below and tell what you tried and how it went.

Saturday, July 21, 2018

Reasons I Get Excited About STEM Challenges in Math

       STEM activities are all the rage, and my goal for this year is to make time for one STEM challenge each quarter this year.  I'll be honest, I'm fairly new to the STEM bandwagon.  Prior to 2016, I hadn't done any STEM challenges and I really had no plans to incorporate STEM in my classroom.  I figured that I had enough on my plate just trying to teach all of the stuff that was in my standards.

       That all changed in the summer of 2016 when I was privileged to attend Honeywell Educators at Space Academy.  Space Camp helped me realize that I not only need to teach my kids math skills.  I also need to help them see the exciting things that STEM can open up for them.  I need to help my students see themselves as people who are capable of using math as a tool solve problems.  So began my experience with STEM challenges.

     Over the last couple of years, I've found some STEM activities that really fit my needs.  This year, I plan to do a STEM challenge every quarter.  I've become a STEM challenge enthusiast, and here are the reasons why I love STEM challenges.

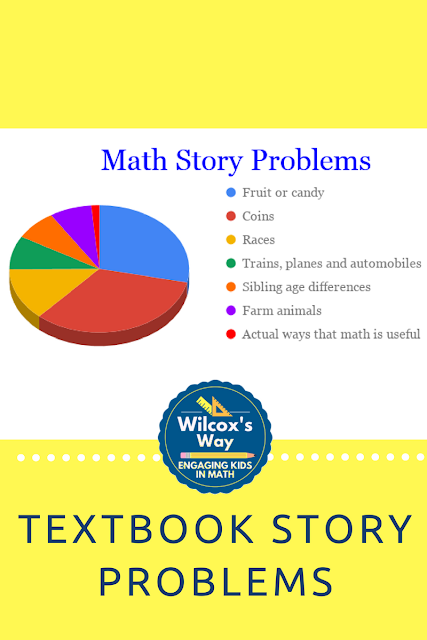
1.  STEM challenges are a great way for kids to really see the real world applications of math.  Let's face it....our textbooks try to use story problems to accomplish this task, but they are often not successful.  The contexts in story problems are often too contrived to make students care about them.

Graph shows a pie chart of math story problems being about food, coins, races and more.

The beauty of a STEM challenge, however, is that you are giving students a problem to solve.  As they complete the challenge, math can be one of the tools that they use to find and gauge their success.

2.   STEM challenges are a place to really show the need for precise measurements.  Measurement of a variable is often the key to determining success in a STEM challenge.  If the challenge is to build the tallest pipe cleaner tower, accurate measurement is definitely a key.  In other STEM challenges, students must stay within given constraints.  For example, if you are only allowed to use 6 square inches of foil in your product, you will need to measure accurately for this.

3.  The need for correct labels is clear.  I was doing a STEM challenge last year where students had to build a shelf to hold as many quarters as possible.  They were given limitations for the size of the shelf, such as less than 6 square inches.  This STEM challenge really exposed my students' misunderstandings about the difference between inches and square inches.  Even better, it gave me a way to address this misunderstanding at a time that my students needed to know that information.

4.  STEM challenges are a great chance to introduce students to the power of spreadsheets.   STEM challenges often involve data collection, and this is a good way to incorporate the technology part of STEM.  Spreadsheets are a great way to collect the data. What a great way to introduce students to the power of a spreadsheet than with a bunch of data that they collected!  Last year we did a STEM pipe cleaner challenge, and there were so many excited students when I showed them that they could enter the calculations once and the spreadsheet could do all of the calculating for them.   In the real world that we live in, much of the math that we need can be automated with a spreadsheet.  It is so important for students to begin to see that math isn't always about doing the calculations yourself, but sometimes about knowing how to get a computer to do them for you!

5.  STEM challenges are a great way to work on a variety of math concepts.  Many STEM challenges involve measurement, data collection, and data analysis.  For many STEM challenges, however, the math part stops with these things.  However, I've found ways to incorporate many other topics:

  • Area, surface area, and volume:  STEM challenges often involve creating some object, so I've found that I can often incorporate area, surface area or volume.  I did a STEM challenge last year where students had to build a diving pool for a daredevil high-diver (pencil cap erasers!).  After the challenge, students had to find the surface area and volume of their pool to see who had the pool with the least surface area.
  • Percent change:  This works especially well if you give students a chance to improve their original creation.  For example, lots of STEM challenges involve students building tall towers.  I've seen these with spaghetti and marshmallows, pipe cleaners, cups, or even balloons!  To incorporate percent change, have the students complete the original project and measure their tower.  Then give them time to make revisions, or wait until another day and have them try again.  Then students can compare the percent change between the first and second attempt.
  • Ratios:  I did one STEM challenge where students had to build a tower from candy and toothpicks.  The catch was that they were assigned a particular ratio of candy to toothpicks that they had to use. 
  • Equations and inequalities:  I've found there are often ways to incorporate equations and inequalities into a STEM challenge.  Let's say your STEM challenge is for students to build a tower that is at least 12 inches tall.  Why not use this to introduce the idea of writing inequalities?  Or you could have all students put their tower heights on a number line, and introduce the idea of graphing inequalities.  When we built our candy/toothpick towers, we wrote equations relating the number of toothpicks to candy.
6.  STEM challenges are a great way to teach a growth mindset.  STEM challenges are all about trying things out and making adjustments to make things work better.   During a STEM challenge, it is no big deal to have something not work and try something different.  What a great opportunity for teachers to reinforce the power of learning from our mistakes to figure out better solutions or understandings.  I take any chance I can to reinforce the power of learning from our mistakes with my students.  


7.  STEM challenges are great for those random days that you don't know what to do with.  You know what I'm talking about....that 2 day week before Thanksgiving when you don't want to start something new.  Or that day when fourteen kids have the flu and you don't want them to miss the lesson that is such a foundation for your unit.  STEM challenges are great to fill in these random days, and yet still be focused on math.

8.  STEM challenges are great to engage all different kinds of students.  Kids love doing hands-on stuff and even my most reluctant math students will dive into a STEM challenge.
Pictures of students completing STEM challenges in a middle school math classroom.


9.  They're fun!   We get so worried about teaching standards and finishing everything that sometimes the fun gets lost.  It's nice to hear the fun and excitement of a STEM day!  It's nice to hear kids in the hall talking about how much fun math is today.  It's nice to have kids still talking about something you did in class a week later.

10.  STEM challenges are a great way to get kids collaborating.  I always have my students work in groups on STEM challenges.  STEM challenges are a great way to get kids exchanging ideas, and incorporating ideas from many students.  This is a great way to work on "soft skills"!

Shows a STEM challenge set up and  math assignment that goes with it.

What is your favorite STEM activity to do in math class?  Comment below!


Saturday, July 7, 2018

Planning for the First Week and Beyond

     In my last post, I wrote about some things to think about when planning for your year.  In this post, I want to talk about how I actually go about implementing all of this.

     When I first started teaching, I used to spend the first day of class going over the syllabus.  At some point I realized how overwhelming (and boring!) that must be for students if every teacher is doing this on day one.  I also enjoy doing activities that help me learn about my students (and their names!) on the first day.  For the next couple of years, I started going over the syllabus on the second day of school so I could spend the first day learning about the kids.  Finally, I realized that there is never a good day to "go over the syllabus" for an entire class period.  I mean, let's be honest.....as an adult, am I able to sit and listen to someone talk about important rules and procedures for 45 straight minutes and actually absorb this information?  No!  So that is definitely not an effective way to go over the very important procedures that I really need for my students to know to have a smoothly running classroom for the rest of the year.


     My current system involves prioritizing my rules and procedures, as well as waiting until they are relevant to teach them.  Instead of teaching them all at once, I teach a few of a day for the first few weeks of school.  I am very strategic and careful about how I teach the rules. As I mentioned in the last post, I start with a list of all of my planned rules and proceduress for the year in a Google Doc.  As I am planning out my first week of school, I start looking over my procedures and prioritizing them.   
  • What procedures are the most important to me?  
  • What procedures will help my classroom be organized and allow for maximum learning?  
  • What activities can I plan to give me a good way to teach my expectations and procedures?
As I'm planning, I pick the most important procedures and find ways to incorporate them in to the first week of school.  

      For me, the very first procedures that I teach are my expectations for the beginning and end of class. I feel this sends a good message to students about the value of class time by showing them exactly what is expected at the beginning of class so we can get started right away each day.  It is also important to me from the very beginning that students know that I expect us to be busy until the end of class (especially because I expect students to wait for my signal to be dismissed rather than the bell).  Another expectation that I teach right away is the supplies that I expect students to bring to class.  Since these are the most important procedures to get my class running smoothly, these are the procedures that I teach on the second day of class.  

       Once I have chosen a couple of procedures to teach, it's time to plan for the rest of class.  At the beginning of the year there are always lots of things that I want to do:  introduce growth mindset, do some goal setting, have the students take an interest survey, and.....do some MATH!  After teaching a couple of basic procedures, I pick an activity that meets one of these other goals.  Often I am able to naturally incorporate a few other procedures or expectations to go with an activity.  For example, if I  an activity that requires students to pick up a supply at the beginning and be turned in when they are finished, then I have the perfect chance to talk about these procedures.  Or if my activity involves students sharing how they solved a problem, then I take the chance to introduce my classroom listening norms.    Teaching procedures when students need to know, rather than all at one time, them leads to better retention.  

       Each day for the first couple of weeks, I continue teaching a few norms, rules, expectations and procedures.  I also continue to reinforce the rules that I have already taught.  It helps students to hear expectations several times over the first few weeks. It is also important to give students feedback on how they are doing with meeting expectations over these first few weeks.  Now is the time to teach your students how to do things the way you want.  Remember, you're teaching students how you want things done for the rest of the year.  It's worth a few extra minutes now to consider the ideal way you want things done.  Let's look at something that will happen a lot: turning in papers.  In my classroom, I have an alphabetical file sorter that I use for turn in.  As I imagine this happening, here are some things that matter to me:

I love that the papers are easy to stack, and in alphabetical order when students turn them in!

  • I want all of the papers facing the same direction.
  • I want all of the papers placed all the way under the first letter of the student's last name.
  • I want students to be relatively quiet during the process.  
  • I want students to return to their seat as soon as their paper is turned in.
If these are the things that are important to me, then I make sure that I tell students these expectations before they turn in papers the first time.  As they turn in papers, I am closely evaluating how they are doing.  If I notice a problem, I point it out as something we can improve next time (or perhaps something that we need to try again right away).  I also note anything that is done exceptionally well.  I will make sure to reinforce these expectations the first several times we use this procedure.  Let's face it, if you don't take time to get things going smoothly now, what's it going to look like in April or May?!?!

      Throughout the first few weeks of school, I keep my list of procedures close by.  As I teach a procedure, I cross it off my list.  This list is always close by the first weeks of school.  I use it during class as I teach my procedures.  I use it as I plan, to keep track of what procedures still need to be taught.   It is a well-worn friend by the time I get all of the procedures crossed off!

      You can also use other activities in your classroom to teach some of your procedures.  Do you enjoy using stations for your classroom?  Then use stations as a way to teach some of your procedures!  As a bonus, you can use those stations to teach students your expectations for moving around the room when doing stations.  Enjoy using games for practice?  Plan a Jeopardy game using questions off of your syllabus  and teach your expectations for playing games.  Love the collaboration and fun of escape rooms?  Plan an easy puzzle based on your classroom rules and teach students about perseverance, collaboration and growth mindset!

     It takes a few weeks, but I feel like this way of teaching procedures, rules and expectations is much more effective than having a boring day of class to go over the syllabus when I overwhelm students with more information than they can possibly take in.   There is a day that I love every school year.  There comes a day, usually a few weeks into school that I realize I didn't have to teach a single procedure....just math, all day long.  That is one of my favorite days each year....and it always goes more smoothly because the students know how I want them to do things!

Friday, June 29, 2018

25 Questions For Planning Your Classroom Procedures

       I've always been a big believer in the power of planning and teaching classroom procedures.  I can still remember my first year when I thought that  I would just go over the rules on the first day and start teaching on the next day!  It only took me that first year to realize how much more goes into setting up your classroom in a way that works.  I spend time every single year setting up my classroom procedures.

      Usually, the first time I start to think about my classroom procedures is at the end of the year school....no, that's not a typo!  I said the end of the year.  I always start thinking about changes that I want to make for the following year in May.  The end of the year is the perfect time to begin the reflection process because that is when you know what is driving you crazy!  Some of that stuff is just the normal stuff that always drives you nuts at the end, but perhaps some of these pet peeves could be improved or fixed with different procedures.  Kids not coming to class prepared?  Maybe you need to rethink your beginning of class procedures.  Not happy with the time spent checking homework?  Perhaps revamping your homework procedures could help.  Usually in May I start a Google Doc that has a list of what needs to change for the next year.  At this point, I may not have all the solutions, but at least I know what procedures I need to think about and look for ideas over the summer.


       Once I'm ready to start planning, deciding my classroom procedures for the school year is always the first thing that I do to prepare.  Once I know the procedures I want to use, I can be more effective with things like classroom set up.  I can make sure that my classroom set up supports my procedures.  I can make sure that if I buy something, it will really be what I need for the year to come.

     When I'm planning out my procedures for the year, I always start with my list of things that I wanted to change.  Then I try to think through what a perfect class period would look like from bell to bell.  This vision is what drives my procedures.  I'm always thinking about how my classroom procedures can support my vision of what class should look like.   Personally, I like to be as specific as possible and plan as much as I can in advance.  In addition to the "regular" day (if there is such a thing in middle school!?!), I also try to plan out stuff that doesn't happen every day, but is still important.  For example, knowing how I want to handle study guides, tests and retakes is important in my planning.


Here are some of the things you will want to consider when planning for a new year:

  • What materials do you want students to have for class each day?
  • What are your expectations for students when the bell rings each day?
  • What do you plan for students to do each day for the first few minutes of class?
  • How do you plan to take attendance?
  • How will you manage student absences?
  • What materials are available for students to borrow?  
  • What will you do about students that don't have the necessary supplies for class (books, calculators, pencils, etc...)?
  • How are you going to handle student requests for drinks and bathroom breaks?
  • How do you want students to handle sharpening pencils and other tasks that might require them to get out of their seats?
  • How are you going to assign homework?  How will you grade it?
  • What is your grading policy going to be? Will you have categories (tests, quizzes, participation, etc...)?  What percent of the total grade will go to each category?
  • How will you get your student's attention when they are working?
  • What do you want students to do with graded papers?
  • How do you want students to organize notes and notebooks?
  • Where will students turn in papers?  
  • Who will return graded papers?
  • Will you have any classroom jobs that students can do for you?
  • Do you need to have any procedures in place for technology in your classroom?
  • How will you handle the end of class?  Do students need to wait to be dismissed, or can they leave then the bell rings?
  • What clean up procedures need to be in place for the end of class?
  • What will your retake policy be?
  • What will your late work policy be?
  • What is your policy for calculator use?  Use of other technology?
  • What other procedures are important in your classroom?  (Examples include effective group work, classroom discussions, how to respond to feedback, etc...)
  • Will you have some structure set up for challenging students or early finishers?
       Personally for me, I organize all of this into a Google Doc.  I find it easier to group them into categories, and then each year I can update and change easily.  Then I just change the date at the top, and I've got my procedures planned out for the year!  Then I'm ready to start on the rest of the tasks that need to get done before the new year begins.

Friday, June 22, 2018

Favorite Technology Part 3: Quia

       Today's favorite is actually one that I pay for, but it's worth the $49 a year to me.  Quia has lots of ways to create online practice activities.  There are a total of 15 activities that you can create for your students.  My favorites are Battleship, Challenge Board, Cloze, Flashcards and Rags to Riches.


        Battleship is just like the board game.  Students play against the computer.  Each time they answer a question correctly they get a turn to try to sink the computer's battleship.  It can be a fun way to get my kids practicing.   Rags to Riches is similar to Who Wants to be a Millionaire.  This is another game where students play against the computer as they answer progressively harder questions to practice.  The flashcards allow students to play Memory.

       The Challenge Board is also fun.  It is basically a version of Jeopardy.  This is a fun one because it does allow students to play individually or with a partner.  It's also a great way to review since you can create different categories.

       These are all fun ways for students to practice and get feedback....but they are actually not what I love about Quia.  Quia is what I usually use for online quizzes.  As much as possible, I use Quia to give formative assessments because it is such an easy way for my students to get useful feedback that they can learn from.

       There are three main reasons why I love giving quizzes on Quia.  First, I love that the grading is quick and easy.  Quia will grade multiple choice and multiple mark items for you.  It will also grade short answer questions for you, based on whatever answers you have indicated are correct.  It is also easy to override the automatic grading if a student gives a correct answer that you didn't think to list in your answers.  Quick feedback is good for student learning, plus a the online grading is a major time-saver for me!

     The second reason I love giving quizzes on Quia is that I can give students feedback AS they take the quiz.  Yes, you read that right....AS students take the quiz.  This is really the reason why I'm willing to pay for Quia.  You can set Quia to give students one question at a time, and to show them feedback as they go.  Using these settings, students get feedback on the quiz as they take it!  So I always base my feedback for incorrect answers on what might be a common mistake or misunderstanding.  I just love the idea that students could be learning AS they are taking an assessment.

       The third reason I love using Quia for quizzes is still about feedback.  Once all of the students have taken the quiz, you can look over each question one at a time and give even more feedback.  For example, if a student made a different mistake from what my feedback for incorrect answers anticipated, you can give customized feedback just to that particular student (or to all of the students that made the same error by copying and pasting).

       I have tried using Google Forms to give quizzes, but have just found that it takes me longer to create a quiz with the same feedback.  I also find it takes me longer to give individualized feedback through Google Forms than through Quia.  I use Google Forms for surveys and other things, but generally for short quizzes, I prefer Quia.

        Giving feedback to students is hands-down one of the most effective teaching strategies that we can use in our classrooms.  I feel like Quia gives me a hand in effectively doing this in a very timely manner!


Wednesday, May 23, 2018

Scheduling a Year of Math Challenges in About an Hour!

       This past year I had the idea to have an extra Google Classroom that I called my Challenge Classsroom.  This way, I had information in one place for all of my students that were interested.  The code was on a poster at the back of my room.   I posted fun challenges that I found throughout the year that kids could work on.  I still continued to post a "Challenge Problem of the Week" on paper at the back of my classroom....well, it was supposed to be a problem of the week.  Unfortunately, if I'm honest, it was a problem of the week until I started to forget some weeks.  By the end of the year, it may have been more like a problem of the month.   Good intentions foiled again!

       But can I tell you how excited I am?  I already have my Google Challenge Classroom set up for next year.   The Challenge Problem of the Week is already scheduled for August through May.  So I can't forget!  I can still change it or add to it...but just knowing that it is already done is so great!   In addition, I have some "Any Time, Any Topic" challenges that will always be available to kids.  My final category of challenges that is already set up in my Challenge Classroom is one that I call -"Wonder Math".  Basically, I search up pictures that are interesting and likely to make kids wonder about stuff that may be math-related (for example, a pool filled with jello; a world-record sized pie; a life-size gingerbread house) and just ask the questions "What does this make you wonder about?  How could math help you answer your questions?"    There are a few reasons that I love using Google Classroom to manage my challenge work for my classroom.


1.  I love being able to schedule everything out.  I want to have a problem of the week, but honestly as the year gets going this is sometimes one of the things that gets forgotten about.  Now I was able to devote a block of time to get it done (and it took me under an hour since I had all the challenges ready to go)!

2.  I love the flexibility of being able to share all kinds of stuff that gets me excited about math.  I'm always finding some news article, website, video or something else that reminds me of something we're doing at school.  Through Google Classroom, it's so easy to share all of these kinds of things.

3.  I like being able to use topics to organize the different types of challenges.  This way I can have problem of the weeks, plus other types of challenges all housed in one place.

4.  I can have one place to house all of my challenges for every class.  All I have to do is post the code to join and every kid that wants access can have it.  It even allows kids that I have in math club, but that I may not have in class, to join in the challenges.

5.  At the end of the year, I will have everything in one place.  It will be so easy to reuse the posts that I really like and update with new ones.

6.  It gives me a way to provide lots of options, which give kids so many different choices.  Hopefully they will be excited about at least some of the possibilities. (And it is one more answer to the eternal "Jill is bored in your class" line that we all may have heard).

Here is a video where I walk you through how I set up my challenge classroom.  If you're interested in the resource that I used for all of my weekly challenges, I used these Year of Weekly Challenges.


Here are some other great sources for challenge problems:
Open Middle
7th Grade Challenging Math
Math Counts (some stuff is paid, but they have lots of free stuff as well)
Figure This


Sunday, May 13, 2018

Favorite Technology Part 2: Quizizz

     For part 2 of my favorite technology I want to focus on Quizizz.  Quizizz is a little like Kahoot, but there are some differences.  I can't really say that I like Quizizz or Kahoot better, but I find they each have uses that they are best suited for.

       Just in case you're not familiar with either Quizizz or Kahoot, the basic idea is that you create multiple choice questions.  Students answer them and get instant feedback after each question about whether their answer is correct.


      Here are some of the things that I like about Quizizz.

1.  Quizizz is self-paced.  If I want my kids to practice a few questions getting feedback along the way, Quizizz is the way to go.  Students go at their own pace, moving on to the next question as they finish.   Some of my kids that are slower workers find Kahoot to be frustrating, because they are always feeling rushed to keep up with classroom.

This is the student view during a Quizizz.  The top shows the difference between a multiple choice and a multiple mark question.  At the bottom you can see the response for a correct or incorrect answer.
2.  Students see the question on their own screen, rather than on the SmartBoard.  This one might seem minor, but when you have students looking at a graph, table or other image, this can be much easier when it is closer to them. 

3.  You have a lot of flexibility with how much time you give to students.    Quizizz allows longer times.  You can choose to give students any from 5 seconds up to 15 minutes.   This is less stressful for my slower workers.  It also allows for me to ask more in-depth questions that a fast paced Kahoot doesn't allow for.


4.  Easy to combine questions from different quizzes.  Quizizz has the option to add questions from different quizzes with the click of a button.  I LOVE this feature.  Super convenient, and really helps me get the Quizizz just how I like it.

5.  You can assign these as homework or play them live.  I love that you have options.  Honestly, this is usually what helps me decide if I want to use Quizizz or Kahoot.  If I want to play live, I usually go with Kahoot.  With Kahoot, all the kids are doing the same question at the same time.   So I really like Kahoot if I want to be teaching along the way, based on what questions kids are missing.  If I'm really wanting to give kids a chance to work independently, and then decide what direction my teaching needs to go, then I like to use Quizizz.  That way, I can look over the results when everyone finishes.  I really like assigning a Quizizz as homework, as students can do it over and over.  Great opportunity to practice!

6.  It's quiet.  I'll admit it...I love Kahoot, and the kids love Kahoot, but there are days that I just don't have the energy to deal with the noise.  Or when the room next door is taking a test or giving presentations and I need to be quiet.  And then, it's Quizizz to the rescue.  You can use the same types of questions, but it does make for a much quieter classroom.

7.  Great data that is easily accessible as kids play, and when everyone finishes.    I love both views of the Quizizz data while kids are working on it.  You can toggle between two different views:  the first view shows the overall percent of questions correct.  The other view is by question.  I really love the question view, because it really allows me to focus my teaching on the problem areas.
       Then once everyone finishes, there is even more data available.  One of the pieces of data that I really love at the end of the Quizizz is the part that shows the average time spent on a question.  This has led to some good conversations in my room about how rushing and not reading carefully can lead us to poor results.


The top picture shows the question view during the game.  It's nice to be able to see as you go which question students are struggling with.  There is also a student view during the game...you just have to be careful about displaying results with student names.   The bottom picture shows the overview given after the Quizizz is over.  I love that you can see time spent on questions, as well as percent that got it correct.

8.  You have the option to either have multiple choice or multiple mark questions.  I know on our district and state tests, we see a lot of multiple mark questions.  These are so hard for kids, so the chance to practice them is terrific!

If you haven't tried Quizizz yet, maybe it's time to give it a try!

Saturday, April 28, 2018

Favorite Techology Part 1: Desmos Teaching Activites

         I'm going to spend a few blog posts talking about some of my favorite technology sites and applications to use in my classroom, and my favorite features of each.

       Usually, I'm a "save the best for last" kind of gal, but for this I've decided to dive in with my favorite....Desmos!  I have written before about how much I love Desmos, but today I want to tell you about a few of my favorite features (and a little bit about how to use them!).

     There are tons of cool activities that have already been created to use on Desmos.  If you've never tried any, poke around and find one to try.  My favorites are MarblesSlides and Inequalities on the Number Line, but there are tons of great ones to pick from!

     Here are a few reasons that I love creating my own Desmos teaching activities:


1.  One of the things that I love about Desmos activities that I create myself is all of the different options that I have for what I can add to them.  Here is what you can add to your Desmos activities:
  • graph
  • table
  • sketch
  • media (picture or video)
  • note  (you give information to students)
  • input  (students input text or math equations)
  • choice questions (choose between multiple choice, multiple mark, or explanation)
  • card sort or marble slides activity
You can even combine more than one of these things on to a single screen.  For example, you could have a graph on the screen and an input box where students have to respond to a question about the graph.  

2.  Another thing that I love is that I can see all of my students work on one screen.  I can quickly see who has finished which slides.  I can click on a student's slide to get a closer view of their work.  This really allows me to give students real-time feedback!  Having everyone's answers in one place also allows for terrific use of student work to guide discussion, as I can quickly scroll through answers to find ones that I want to highlight in class.

Notice that Brahmagupta has made a mistake on the purple line.  This makes is so easy to find mistakes and talk with students.


3.  My class really likes to have me use the "Anonymize" feature, which assigns each student the name of a famous mathematician.  It's fun to hear, "Cool, I'm Katherine Johnson!" or to see kids looking up mathematicians to find out who they are.  I also like this feature because when I notice a problem, I can call out "Pythagoras, it looks like the second point on your graph is off.   Please double check it" and give kids feedback without embarrassing anyone.

4.  I like to set up my activities so that students get to see the answers of other students after they complete a slide.  I think it's really helpful for students to see what other classmates were thinking, and how they justified their thinking.

5.  Another feature that I really love about Desmos is the fact that you can carry forward a graph from one screen to another and kids could continue to work on a graph from one screen to another. 


If you're ready to create your own Desmos activity, go to https://teacher.desmos.com/ and choose  choose "Custom" on the menu on the left side of the page.  Then click "New Activity" in the upper right hand corner.    Then click "New Activity" in the upper right hand corner of the next screen.


This short video should give you some ideas of how to add things to your Desmos activity.


Good luck, and I hope you love creating these activities as much as I do!


Thursday, April 12, 2018

Ideas to Create Your Own Escape Room Puzzles

     In my last post, I talked about the huge multi-day escape room activity I was doing to review for state assessments.  I've done two days so far, and it has really been going great!   If you're considering designing your own escape room style activity, here are a few tips to consider.

math escape room


1.  Start with the skills.  As with anything in education, you've got to start with a clear idea of what skills you want students to practice.  Otherwise it's easy to get lost in planning fun puzzles and lose track of what's really important.  For my escape room activity, I started with a list of the top eight skills that I most wanted my students to practice again before state assessments.  From there, I knew that I wanted one puzzle to go with each topic.

2.  Try using a worksheet/activity that you already have.   Some of my puzzles were fancier, but some of them were pretty simple.  Some of the simplest puzzles were simply a list of problems from a pre-existing worksheet, and an answer bank.  When you're planning an escape room activity, there are all sorts of codes you can have: letters, numbers, directions, colors, and shapes are the first that come to mind.  So when you put down your answer bank, just attach a letter (or number or color) to each answer and there you have it!  Students solve the problems and use the answer bank to find the correct "code".

3.  Make clues that force students to do all of the problems you want them to do, not just some of them.  As I was creating clues, I started off with clues like "The answer to problem 2 plus twice the answer of problem 5".  If all of your clues are like this, students will only complete the problems that they have to in order to get the code.  If you want them to complete all of the problems, consider having at least one clue that forces them to look at all the answers, such as "the difference of the largest and smallest answer".

4.  Get creative and add some fun and interest to the puzzle with fake generators.  There are all sorts of cool sites that allow you to generate fake text messages, tickets, receipts, etc....    Simple things like these can add some fun to your escape room activity.  Here are a few links to get you started:
                                     Fake Text Messages
                                     Fake Concert Ticket Generator
                                     Fake Headline Generator
                                     Fake Receipt Generator
escape room math review


5.  Get creative with how you let students know the correct order of the answers in the code.  I tried to vary this to keep my students thinking.  Here are some things I tried:

  • Used a colored border at the top of the paper.  Each problem had a colored dot next to it.  Students had to match the order of the border to get the answers in order.  
  • Put a different letter with each problem, and then give a clue how to rearrange those letters to spell a word.  When I tried this, I had a puzzle about surface area.  The boxes held the letters A-N-I-S-T.  Somewhere else on the page were the words, "A very good person".  Students were supposed to come up with the word saint.
  • Put a different word with each problem, that spell out a common phrase.  Students organize the answers according to the phrase.  One of my puzzles had four sets of problems, and each set of problems would leave students with one number.  The boxes were labeled with these words: ALLIGATOR LATER YOU SEE.  Students had to reorder the numbers to make the clue say SEE YOU LATER ALLIGATOR, and this gave them the 4-digit code.
  • Use a visual clue.  One of my clues, I simply had a different number of dots on each section.  Students were supposed to put them in order from one dot to five to find the correct code. 
Good luck helping your students to escape the classroom!