Thursday, December 7, 2017

The Best Math Christmas Project Ever

    Ok, this will be a short post.....but I just have to tell you how excited I am about my classroom Christmas tree this year.


     We decided on a 3:1 ratio of green pyramids to other colored pyramids for the "decorations".

     I'm excited.  The kids are excited.   What a win-win!  And it's been pretty easy.  The only supplies I've needed are colored copies of a net for a triangular prism and tape.  One day for my warm up, I reviewed the surface area and had every kid fold up one pyramid.  And that is the only class time I've taken to do this.  The rest was kids taking these home to work on, or kids that wanted to work during our advisor/homeroom time at the end of the day.

     I will definitely do this again next year.  I think one thing I will change is that I will use the chance to more fully review surface area and make kids draw the height in on the base of the pyramid.  Then I'll have them find the surface area.  I'll probably also give them 10 minutes or so to decorate their pyramid, but you wouldn't have to do that.

Patterns.  Geometry.  Math.  Art.  Beauty.  Creativity.  Christmas Decorations.  It's perfect!

Students decorate triangular pyramids and put them together to make a math Christmas tree.


Update:  When I did this last year, I just used a basic pattern for a triangular pyramid printed two per page.  This year, I'm going to make it a bit fancier.  I have several patterns for students to use.  Some of them have clip art that kids can color.  One pattern reviews area of triangles and has students find the surface area of the pyramid.  One pattern focuses on acts of kindness and one focuses on different things about the student.  I think I will have each kid make two of these....one of their choice and then everyone will do the area of triangles one.    I'm also excited that I think I have the other 7th grade teachers on board to do this as well, so I think we will be able to take this to the "next level" and have an even bigger tree!

Use triangular pyramids to build a math Christmas tree pyramid.

       It's easy to do this project with a simple triangular pyramid that you can easily find with a Google search.  Click here for a video tutorial explaining how to put the pyramids together.  If you'd like the patterns shown above, click here to see this at my Teachers Pay Teachers store.

Sunday, December 3, 2017

Your Math Class Will Love Going To the Movies

     There are lots of great scenes from books and movies that can be used to launch math activities.  Today, I'm going to focus on a few of my favorite ones from over the years.


     Probably my favorite all time movie connection actually comes from the special features of the first Lord of the Rings movies.  There is an awesome documentary where they talk about how they use forced perspective to make Frodo look shorter than Gandalf.  The clip shows how they use the actors' distance from the cameras as well as the size of sets and props to accomplish the visual illusion.  If you click here, it will take you to a link on YouTube.  The video is 15 minutes, but the first 5 minutes are the best part.
      After watching this clip, we've had some fun projects based on this.  One year, I typed up a "script" for a short scene between Frodo and Gandalf.  Then I had students in class plan out where each person needed to stand so that they could make Gandalf look taller than Frodo in our scene.
     Other times when I've done this project, I've also had the students make easy props (such as teacups) that were normal size for Frodo, but tiny for Gandalf.  The props are identical in every other way except the size.  This way, when Gandalf picked up his tiny teacup that otherwise looked exactly like Frodo's, it helps sell the illusion that Gandalf is larger.  These activities force students to use measurements, scale, as well as reinforcing student understanding of reciprocals.
      Forced perspective is also used in the movie Elf (at the beginning when Buddy is a huge Elf at the North Pole) and some in Harry Potter, to make Hagrid look larger than life.

       Another fun (and similar) project could be based on the movie Ant-Man.  There is a fun scene in the movie where Ant-Man and YellowJacket are fighting in a briefcase.  During the course of the fight, you see giant LifeSavers, IPhones and keys flying by our tiny hero.  We are finishing our Stretching and Shrinking unit right now....so what better time to make giant versions of classroom objects!  Yesterday, I challenged my students to take an object that would fit inside a briefcase and use a scale factor to enlarge it.  (Note:  I used 10 as my scale factor, and that was REALLY big!  I would probaby recommend 5 or 6.)  When they finish, I plan to post them on a wall as a backdrop for some fun Ant-Man pictures.  Click here to get a clip of this scene.  You only really need to show from 2:00-3:00 to see what is needed for this project.
      To get a Google Slides presentation to launch this project, click the graphic below.
Fun middle school math project idea to enlarge simple desk supplies like rulers and pencils.


      Mythbusters once did an episode on zombies, and one of the tests that they did was whether it was realistic to be able to outrun a horde of zombies.  They tried different population densities and had someone see if they could run a certain distance without being "caught" by a zombie. One of our units, Comparing and Scaling, has a huge focus on unit rates.  So I used this clip to introduce the idea of population density.  We figured the population density of our classroom, gym, and cafeteria.  Then we looked at the population density of several cities.  Finally, I took my kids outside to the football field, and we tried it ourselves.....with most of my class playing zombies and the a couple trying to outrun them.  The kids LOVED it! This clip is a short version....it just the simulation for one population density.  It gives the dimensions of the field and the number of zombies.  To find the rest of the episode, here is the clip I found.  The quality is not great, but you can see it from 26:30-29:00 where it explains the other populations densities they tried.
       To get a copy of an editable lesson to go along with this video clip, click the graphic below.


Click here to find some of the other fun projects I've blogged about!

If you would like more ideas for engaging math lessons like these, click here to join my mailing list for ideas and freebies sent right to your inbox once or twice a month!

Movie clips will introduce some fun projects in your middle school math class.


Sunday, November 12, 2017

Celebrating National STEM Day by Putting the M in STEM

    November 8 was National STEM Day.  When a colleague came in my room a couple of days before that to ask what I was going to do for National STEM Day....I'll be honest.  My first thought was, "I'm so far behind my pacing guide....I can't afford to do ANYTHING!".  But as I sat and thought about it, I came to the same conclusion I've come to several times since attending Space Camp....my job is not only to teach kids math skills, but to inspire them to want to learn math.  My job is to show them that math could be a part of their future, and that it could be a good thing.


     So I decided that I would do a STEM activity, because my students needed that chance to be creative, and work collaboratively, and do so many other things that STEM can do in the classroom.  And I did work in some important math from my standards (even if it wasn't exactly what my pacing guide said I should be doing!).

     The challenge for my students this time:  To build a tower with a shelf at the top that could hold at least two quarters.  Students had a limited amount of "credits" to spend, and they got bonus points for unspent credits.  They also got bonus points if their tower could hold more than two quarters.  Each group had to draw three cards that guided their building.  The cards had inequalities that gave students criteria they had to meet for tower height, base area and shelf area.


      I don't know about your students, but in 7th grade, many of my students still struggle with inequality symbols.  There were many discussions throughout the day about the meaning of the cards.  "Does this mean our tower can be 5 inches, or does it have to be taller?"  "Does the area of the base have to be more or lesss than 6 square inches?"  "How big is 3 square inches?"  I find the open-ended activities like this are a great chance for formative assessment for me, if I listen to the students having conversations with each other.  For this lesson, I could definitely tell that many of my students didn't fully understand inequality symbols, as well as the difference between inches and square inches.

     After a short introduction, my students ended up with about 30 minutes to work on this STEM challenge.  That seemed to be just about the right amount of time.  Because students got extra points for unspent credits, they were very careful about material use.  That was one nice thing about this STEM challenge....the materials ended up being really cheap!  The things I had available were graph paper, index cards, tape, staples, straws, foil (cut in 2" squares) and pipe cleaners.

     My student creations were AMAZING!  I had one group that used a single piece of paper, and built a 5 inch tower that held 15 quarters.  I had groups in every hour that build towers so sturdy that 30 quarters wasn't enough to topple them (I realized in 1st hour that I had to put a limit on how many extra points they could get for sturdiness....one group of boys built a tower that held 5 huge library books and still hadn't toppled!).  Students were engaged, creative, and working hard....STEM for the win!

     The next day, I used this as a chance to teach kids how to graph inequalities on the number line.  In each class, I had a handful of students that remembered learning this in 6th grade, but the majority did not.  Using the cards from the STEM challenge, student quickly understood how to graph inequalities.   I feel like this made it well worth it to have take the time to do the STEM challenge.

If you're interested in this Inequality STEM Challenge lesson, you can get it at my TpT store.
   

Tuesday, November 7, 2017

Increase Homework Quality with Free Rubric

    A couple of weeks ago, I wrote about why I switched to giving weekly homework.  Over the three years that I have done this, I have definitely made a couple of adjustments that have helped this system work better for me.

     One of the adjustments that I've made has to do with grading. In my class, I hand out the homework on Friday, and it is due the following Thursday.  The day the homework is due, I pass out red pens, project the answer key on the SMART Board and kids check their own work.  When I enter homework in the grade book, I enter a completion grade, rather than grade the assignment based on the number correct.

        One reason I like this system is that I feel like it lets me focus on the big picture.  When I'm entering the regular score for a homework assignment, I don't have to look closely at every problem for every student.  However, I give each paper a quick scan to make sure that it was completed.  As I grade, I look for patterns.  If I notice that one problem was skipped or missed frequently, I know that this is an area that needs more attention in future assignments, as students did not feel as comfortable with this content.  Because I'm only having to enter homework grades once a week, I have time to look for these patterns.  I also can look for students who are struggling with multiple concepts.

     However, this system was frustrating for me (and my more studious students) at times.  I know that there were a few students who put little effort into the assignments, knowing that their grade was not necessarily determined by the number correct.  This year, I have implemented another part of my grading system.  Each individual homework assignment is still entered into my grade book graded on completion.  It is usually 5 points per week.  Each week, I randomly choose about 6 students whose assignment also gets graded based on a "Homework Quality Rubric".

Free homework rubric to encourage students to complete quality work.


     This rubric looks at several characteristics of the assignment.  The rubric is based on six categories:  Assignment Completeness, Accuracy and Knowledge, Work Quality, Math Language, Legibility/Organization, and Student Reflection.   I feel this gives me a chance to reflect important characteristics on how students are doing at completely a quality piece of work.

  • Are the answers correct? 
  •  Did they complete every problem? 
  •  Did they show their work?  
  • Is their work organized and easy to follow?  
  • Did they label their answers?  
  • Did they use correct vocabulary? 
Because I'm only having to grade about 6 of these per class, I can take a little bit more time to look in detail at these factors.

     At the beginning of the quarter, I put student names on all of the rubrics.  Then each week I can randomly pull some from the pile to use.  Students get very specific feedback about how to improve the quality of their work, and since they don't know when it will be the week that they will be graded, there is an incentive to put quality effort into the assignment.

      The second adjustment that I've made to my homework system is new this year, and I love it!  This year, I started adding some student choice and differentiation to my homework assignments.  Each assignment is a worksheet, front, and back.  Everyone is expected to complete the entire front side.  The back side of the assignment is divided into three sections.  Two of the sections focus on skills practice.  The third section is usually called "Open-Ended Problem Solving".  This section is intended for students that don't need skills practice, as a way to push them.

Example of weekly homework sheet.
This was part of the choice section on the back side.  At the top of the page, students indicate what section they are choosing and why.  During a couple of weeks prior to this, I had noticed many students confusing finding percent vs. percent change after a lesson we had done.  We were working on complementary and supplementary angles at the time, and I know some students were still struggling with this.  

       This is probably the best adjustment that I've made.  The skills sections on the back are a great way to address common errors and misconceptions that I'm seeing in class or on the homework.  At the beginning of the year, I used it to review content from previous years.  Now as the year has gone on, I am using it more to address class needs.  I love that this makes me pay more attention to what my students need.  Each week, I know that I'm going to need a couple of skills to work on for the homework, so I'm always on the lookout.  If I notice a problem that lots of students skipped or a problem that lots of students missed on a quiz, these become the skills practice areas on my homework.  I feel like this has made my homework more relevant to students, as the practice becomes an adjustment to their area of need.

Use homework to address class misconceptions.  The picture shows a notebook.


      When I hand out the homework each Friday, I briefly go over the three sections.  Sometimes I might do a quick review based on the skill.  I also let students know why they might want to choose a particular section.  "If you missed #5 on the quiz yesterday, you'll probably want to complete section B".  In my experience, middle school students are not great at knowing their needs academically.  This gives this a chance to practice self-assessment and work choice.

If you're interested in copies of a sample of my weekly homework or the homework rubric, click below.

Homework Quality Rubric
Sample Homework

If you're interested in more tips, sign up for my email list by clicking here


Ideas to improve homework quality


Note:  My school uses Connected Math curriculum, so my homework follows the pacing and examples of CMP.

Saturday, October 28, 2017

4 Ways to Give Feedback to your Class

      There is so much research that supports the effectiveness of giving feedback to improving student performance.  In order to be effective, feedback needs to be both specific and timely.  That makes perfect sense, but that can also be a real challenge.   Here are a few ways that I like to give feedback to my class.

1.  Games--Games are such a great way to get students engaged, but also a great way to give feedback, especially when answers are wrong.  There are so many fun games to play.  One simple game I played last week I called, "Get 5".  I  decided to do this in the middle of class when my planned lesson was NOT going as planned.  Anyway, it was pretty simple.  I challenged my class to get 5 questions in a a row correct. I put a problem on the board and gave everyone a chance to work with their partners to answer the question.  Then I rolled a 30-sided die to randomly call on a student to give me the answer as well as how they got it.  If the class could get 5 in a row correct, I gave them a stamp for our school-wide PBIS program.  It worked great....lots of conversations, and students knew that everyone at their table needed to understand.  Kids were giving each other feedback, and I could give feedback based on conversations I heard or answers given.

2.  Partner activities--I love to do self-checking partner activities, and it allows students to give each other feedback.  Since students are checking each other's work, it frees me up to listen to student conversations and intervene as needed (or to have small group instruction).  They are fairly easy to create....the idea is that you assign each student to either be partner A or partner B.  Each student has a different set of problems.  I usually like to have about 6-8 problems, depending on what the topic is.  The key is that although the students have different problems, the answers are the same.  For example, student A might have the problem -13 + 8 and student B might have the problem -4 + -1.  Each student gets practice, and students know if they don't get the same answer that they need to check over their work.  I like to take my partner activities to the next level by creating a "second part" for each activity.  So after the partners have completed the problems and agree on the answers, then they have to use their answers together to complete another task.  For example, I might have the students from above show each of their problems on a number line, or create a story problem to represent each problem.  This is a great way to handle students working at a different pace, or just to extend the learning opportunities for the partner activity.  I have several sets of partner activities available in my store if you're interested.
3.  Dry erase---This is certainly nothing new, but having kids work problems on dry erase boards is certainly a quick, easy way to gather information about my class thinking.  It's easy to address common misconceptions using a simple feedback tool.  To do this, I'll think about the common errors that I know may happen, and I create a comment with a symbol for each, to guide students toward their error.  For example, if I was teaching adding integers, I might put the following information on the board.

Then with each problem, I could call out different answers, and tell them which feedback was appropriate for each answer.


4.  Use technology to give feedback--Technology truly can help us understand what everyone in our class is thinking, and give productive feedback to them.  One technology tool that I love (and so do my kids!) is Kahoot.  Kahoot keeps my students engaged, and I get all kinds of information about how many in my class understand.  Additionally, if you plan the incorrect answers carefully, you can sometimes customize your feedback to students, such as "If you picked green, you might have forgotten to line up your decimals.  If you picked red, you may have forgotten to carry."

          Another tool that I love to use to give feedback to my students is the website quia. I LOVE using this to give short, formative assessments to my students.  My absolute favorite thing about quia is that you can customize the feedback that students get for correct or incorrect answers.  In addition, you can change the settings so that students get feedback after each answer, instead of having to wait until the end.  I love this feature!  I know in Google Forms, you can give students feedback, but I don't think they get the feedback until they are done.  I much prefer to have them get the feedback as they work, so they can be learning as they go.  Quia does have a subscription cost of $49 per year, but for me it's worth every penny.


Sunday, October 8, 2017

Beginning of Class Routine Revamp: Part 2

A couple of weeks ago, I wrote about my new beginning of class routine:  Wonder Monday, Two Way Tuesday, What's the Question Wednesday, Number Talk Thursday and Quick Draw Friday.  This routine has gotten me through the first quarter of the year, and I have really enjoyed each of these days.  I have enjoyed the different aspects of math that they encourage.....from geometry with Quick Draw to number sense with Number Talks and Two Way Tuesday.  I've enjoyed seeing the power of What's the Question Wednesday both as a formative assessment tool, and to encourage creativity.  Wonder Monday has sparked many great discussions, and even led a student to actually find the cost of filling a pool with jello....which was over $800 by the way!


But, I have also discovered some other cool resources that would also make great warm-ups.  So I'm thinking I may introduce some of these other ideas from time to time.  Here is my next set of ideas for an interesting way to start class.


  • Math at Work Monday:  I found this awesome website that has a section called Math at Work Monday.  There are interviews with all kinds of people about how they use math at their jobs.  What a great way to open my kids eyes to the power of what we're learning!  I also found out about this cool Chrome extension called Insert Learning that lets you put questions, videos and other content into a website for students to access.  Tomorrow, I'm planning my warm up to be Math at Work Monday while I use Insert Learning!
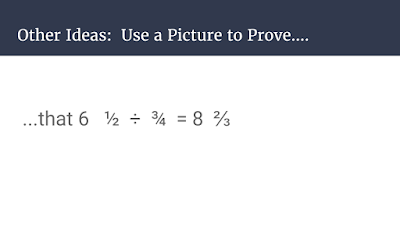
  • Use a Picture to Prove....:  I was inspired by Jo Boaler's book Mathematical Mindsets for this idea.  One of the ways that she recommends opening up a task to make it richer is to have students make a visual to go with it.  I think this could have some real power to get at the heart of some difficult topics...like fractions!

  • Would You Rather?:  The idea is to give a choice like, Would you rather have a 1 foot stack of quarters or a $20 bill?  I got this idea from the Would You Rather Math website, which has lots of great examples.  However it's also really easy to come up with your own!

  • What's the Story (version 1):  I was so excited when I found the Graphing Stories website.  This is sooooo cool, and I think the practice graphing would be so helpful and spark tons of great discussion!
  • What's the Story (version 2):  Find a graph, and have the students write the action that matches the story.  Seems like this would alternate well with What's the Story version 1....going back and forth between seeing the action and then making the graph, vs. seeing the graph and describing the action.

  • What's the Story (version 3):  Find some data, and have students draw the conclusion or decide on the caption from it.  We are in a world with so much data, but how much practice do we give kids at deciding what the data is actually telling us?
If you would like a template for these routines, click here for a simple Google Slides that has a slide for each idea (including the ideas in my Beginning of Class Routine Revamp: Part 1 post!)

Saturday, October 7, 2017

4 Reasons to Make You Love Weekly Math Homework

    About three years ago, I completely overhauled my homework system.  I switched to a system of a single weekly review assignment, rather than the short daily assignments I had been accustomed to giving before that.  Here are the four reasons why I'm so glad that I changed to weekly homework.

4 reasons why I switched to weekly homework
  • #1:   Students have a chance to get help on homework.  When homework is due the next day, students really have no chance to get help if they don't understand something.  Currently, I assign homework on Friday and it is due on Thursday.  I feel comfortable that students have plenty of time to ask questions if they have it....and if something is left blank, I feel totally comfortable telling them that it is their responsibility to make sure they ask for help.   
  • #2:  This lightens the load and gives students a chance to practice time management.  As the mother of a student who works VERY slowly, I know what it is like to face a homework assignment every night....and it is not a good feeling.  Weekly homework gives students and families a chance to figure out what works for completing homework and to build in plenty of time instead of knowing you only have one chance to get it done on time.  7th graders are notoriously bad at time management, and I feel like this is a good chance to start learning.  I can still remember the student I had many years ago who always struggled to finish anything that wasn't due the next day.  I remember him saying, "If you would just make it due tomorrow, I would remember to finish it."  I could practically see the light bulb go on for that boy when I told him that he could decide to make it due for himself the next day, even if my deadline was later.    
  • #3:  I like having a built-in chance for spiral review.  Since the homework is not just over what we did in class that day, it gives me a great chance to frequently spiral back and review skills.  I really think it helps keep the skills fresh.  
  • #4:  I don't lose as much time grading homework since we only have to check it once a week.  This is huge for me.  My class periods are only 46 minutes long, so losing 5 minutes every day is a lot.  But taking 10 minutes one day is much better.
4 reasons I love weekly math homework.

      Now that I have done this for a few years, I have learned some lessons to make it work better in my classroom.  I will talk about those in my next blog post!  But I will say, I have finally figured out a way to do homework that I love and think is good for my students.

My solution to the homework dilemma.

Comment below with your best strategies to make homework effective and useful for students.


Tuesday, September 19, 2017

Talk Like a Pirate (and Practice Order of Operations!)

    Today was the best day.  One of those days that your lesson goes exactly like you want it to, the kids are amazed at what you're doing, and it all just falls into place.

     The first part of the day that was so awesome was related to the fact that is was International Talk Like a Pirate Day.  I've been looking forward to Talk Like a Pirate Day for awhile for two reasons.  Reason #1...my son has an awesome pirate hat that I looked forward to wearing to school.  I also had an old Pi Day shirt (Pi-Rate, When Good Numbers Go Bad) to wear...so perfect!

Reason #2....I had this idea this summer of making a pirate name generator.  I figure I could make up a problem (I used an order of operations problem) and the kids could roll dice, and plug the numbers into the problem.  The answer to the problem then generated the kids' pirate names.  So for example, in the first problem, the kids rolled 4 numbers and plugged them into this expression (___ + ___)^2 + ___*___.   So let's say you rolled 4, 2, 3 and 5 then your answer would be 51.  Then I had a table that told them different names for different number ranges.  So 51 meant the first part of your name was "Thieving".

Click on the picture if you're interested in purchasing this pirate name generator.

My pirate name generator had two parts.  My absolute favorite nickname of the day was Salty Fishlips!  Some of the other awesome nicknames:  Parrot Plankwalker, One-Eyed Devil, Jolly Dog, Bearded Cutlass, Gold-Toothed Buaccaneer....it was a blast!  And the kids got a little bit of order of operations practice in.  As I walked around, I really enjoyed hearing students explain to their classmates how to do the problem as they tried to get their pirate name.  

The only disappointment was that I really wanted a name that involved Scurvy Legs or Plankwalker, and the dice never let that happen for me!

Now, the other really awesome part of today's lesson was the part where I showed the kids how to use a spreadsheet....and they got it, and they were as amazed as I thought they should be at the power of spreadsheets.  But I'll leave that for another post!


Friday, July 7, 2017

Area Model in the Middle School Classroom

In my last post, I talked about using the multiplication chart as a tool in the middle school classroom. I really love this idea of building on elementary tools and techniques in our middle school classrooms. Making these connections to prior knowledge is important for students, and it makes our lives easier. So, today I want to talk about another elementary tool that can be useful in the middle school classroom: the area model. When students are first learning multiplication and area,  the area model are foundational for building understanding. Here are a few ways that I like to use the area model to help teach middle school concepts:

 1. Distributive Property--We all know that this is an important concept moving forward, but it can sometimes be tricky for students to wrap their minds around. I use lots of different strategies to help kids understand the distributive property, but the area model is definitely one of them.
The representation below can be seen as two rectangles, a 5 x 8 with an area of 40 and a 5 x 12 with an area of 60.  Or you can see this as one rectangle, a 5 x 20 with an area of 100.  This is a concept that is understandable for students, and it is a good way to reinforce our abstract ways of showing this concept.
          
area-model
area-model
Learning abstract representations of math can be one of the major challenges as students transition from elementary to secondary math, so connections like these can be helpful.

2.  Factoring--This is the natural extension of using area model to teach distributive property.  By simply leaving out the shared side length, we encourage students to factor, and help them see the connection between factoring and the distributive property.

It's good to start with an example that only shares one common factor, like this one.
area-model
         Students can see that the side length has to be the same number.  Next, we want them to make the connection between the same side length and a common factor of 35 and 56.  Student thinking might be like this: 
 What 5 times what equals 35?  8 times what equals 56?  
Finally, we want to students to make connections between the picture and the to the abstract work: 
35 + 56 = 7(5 + 8).  

Now, you can move to examples that have more than one common factor that could be factored out. 
area-model

40 + 60 = 5(8 + 12).  
Connecting the drawing back to the work is important....where do you find the 40, the 5, the 8, and so on in the picture?   

3.  Battling Common Misconceptions--If you give your students the problems (8)(4.5), would you be surprised to have some students give the answer of 32.5?  Me neither!   But the area model can again help us out.  
If students have been using area model to show the distributive property, this representation should be familiar.  This shows that the area is 36 and gives a visual illustration of why we can't multiply 8 x 4 to get 32 and simply add 0.5.

4.  Reinforce proportional thinking--If I had to pick one topic that was the most important thing we do in middle school, it would be proportional reasoning.  Every chance I get, every way I get, I want to reinforce proportional reasoning with my students.  I want to give them different ways to see it.  So what about this?
Since the side of 3 is the same for both rectangles, if you double the 4 to get 8, it also doubles the area from 12 to 24.

5.  Move towards algebraic thinking--Ultimately, our middle school students need to be ready for the demands of algebraic thinking.  The area model can also give us another way to get students using variables in middle school.  Consider the progression of the examples shown below.


If students are consistently using the area model as a representation in our middle school classrooms, hopefully the jump to the last two representations will be easier.  

      So we've looked at multiplication charts and area model...what other elementary models and tools can continue to be helpful in middle school?


Thursday, June 22, 2017

Multiplication Charts in the Middle School Classroom

     Every year when I put up my posters, I put a multiplication chart near the front of my room.  Until a few years ago, it kind of bugged me.  You know how it goes...kids coming in to middle school should know their multiplication facts, why should I need this, etc....   But then I finally realized I needed to start looking at the good old multiplication chart not for what it might have been in elementary school (although, yes, some kids still use it like that), but for what I could use it to show in middle school.  Because now what I see when I look at that multiplication chart in the front of my room is patterns, patterns, patterns!  That's what math is all about.  Here are some of my favorite ways to use a multipication chart in my middle school classroom.

1.  Equivalent fractions--The multiplication table is filled with row upon row of equivalent fractions.

Here you can see a simple multiplication table that I created on Google Sheets.  The thing I love about my Google Sheets multiplication table is that I can customize it in whatever way is useful.  So if I want to talk about equivalent fractions for 3/8, I can highlight those rows.  But then I can easily change to something else.    What a great way for my students that may struggle with equivalent fractions to have a quick reference to find them, but also a visual way to see that the reason by 12/32 is equivalent to 3/8 is because both 3 and 8 were multiplied by 4!  These realizations that may at times seem to be no big deal for teachers can absolutely blow the minds of our students.

2.  Equivalent ratios/ratio table--Just as we can use the multiplication table for equivalent fractions, it can also be used for scaling ratios up and down to find equivalent ratios.  So now our students are trying to answer some proportional reasoning question:  "It takes James 4 minutes to solve 7 problems.  How many problems can James solve in 12 minutes?"  Again, this idea of using the multiplication chart flexibly, even attaching a label or meaning to some quantity, can be a stretch for kids at first.
This would also be a great way to teach students to think about if the answer to a proportion question like this is even reasonable.  For example, what if the question had been, "It takes James 4 minutes to solve 7 problems.  How many problem can James solve in 11 minutes?"  Now the answer is not actually on the multiplication table...but a sense of what is reasonable sure is.  If 8 minutes is 14 problems and 12 minutes if 21 problems, then the answer must be between 14 and 21 (but closer to 21!).  That sort of amazing proportional reasoning can be supported by a great visual tool like the multiplication chart.

3.  Proportional relationships versus non-proportional (but linear) relationships--Let's say you were focusing on the proportional relationship of 6x = y.  What about showing the multiplication chart as a place to see this?
The multiplication chart can show the table of values for a proportional relationship by simply looking at the column with the correct constant of proportionality.   This gives another way to think of a proportional relationship....it is a relationship that if you had an infinitely large multiplication table, it would have a row on there.  You could also build the connection between 6x = y and 6x + 1 = y by having students add one to all of the values in the 6 column.

       Ok, and honestly, some students will use the multiplication chart because they don't know their multiplication facts.  As much as I wish this weren't true, it just it.  So rather than fighting against it, I've decided to help all of my students see that the multiplication table can be a great tool to help us learn about a lot of middle school concepts far beyond simply multiplying.  After writing all of this, I think this year, we just may create a digital multiplication table in the first few weeks of school to establish right away what a great tool it can be.

How do you think multiplication tables can be helpful in middle school?  What other "elementary" tools do you rely on to make your classroom a better place?

Wednesday, June 14, 2017

Beginning of Class Routine Revamp

        At NCTM, I got several ideas that I wanted to incorporate into my beginning of class routine, and I've been finding others as well.  Here is my beginning of class routine for next year.


Wonder Monday:  This idea is the culmination of a lot of reading and listening that I have been doing.  Jo Boaler's Mathematical Mindset, as well as her growth mindset course have really opened up my eyes to the need for math to be an open and creative field.  I've also been reading "Becoming the Math Teacher You Wish You'd Had", which talks about the importance of a "notice" and "wonder"...what do kids notice about a problem?  What do they wonder about?
           So this is my thought for how to get kids thinking creatively, as well as how math is woven in to so much that we do.  My plan here is to find a crazy or interesting picture each week, and just letting the kids start to wonder about it.  I think it will get their creative juices flowing, and hopefully start to see math as an open subject, with a place for interesting questions.  I think this will be a fun way to start each week!


Two Way Tuesday:  This one came directly from a wonderful session I went to at NCTM.  The idea of the two-way puzzle is that you add going horizontally and vertically.  I think the puzzle aspect of this will keep kids engaged, and I can see it being useful for all kinds of review content....fractions, decimals, whole number, integers, and combining like terms are the first few that come to mind.

In this example, the missing box in the top row would be 22, since -8 + 22 = 14.  The bottom left square would be -5, since -8 + 3 would be -5.  From there, you can fill in the rest of the squares.
What's the Question Wednesday:  I got this idea from another blog I was reading.  Basically, you give the answer, and the kids brainstorm what the question might have been.   Again, I think this could encourage creativity and help kids see that there are all kinds of ways to get to any given answer.


Number Talk Thursday:  This is something else that I've been reading about, and something that I heard about at NCTM.  The idea is basically that you give kids a problem to solve mentally, and then you let kids share their strategies for how they solved the problem.  I tried this out a couple of times toward the end of last year, and I was amazed at what a great use of class time it was.  The kids were highly engaged, and had tons of great strategies.  It also allowed for great discussion as we compared strategies.


Quick Draw Friday:  This is also something that I got at NCTM.  The idea behind it is that you give kids a short look at a geometric drawing, and they try to reproduce it.  Then you give them one more look, and a chance to revise.  Then let kids share their vision for how they saw the picture, and how they re-drew it.  I think this one can really lead to some great vocabulary, and my artistic kids will love it!  The idea comes from this e-book.


       So these are the ideas that I plan to use next year. If you would like a copy of the Google Slides shown above for this beginning of class routine, click here.

One other idea that I would also love to incorporate (but ran out of days!) would be to have a day each week dedicated to looking at a graph and focusing on what story it tells.  I think this is really important as we live in a world surrounded by data, with graphs everywhere trying to convince us of one point or another.  I may try to work this in somehow to my routine, but I can't decide what to give up!  Why is there always more to do than there is time?????

What routines do you use at the beginning of class that you love?

NOTE:  I did a part 2 to this part with even more ideas.  Click here to see the rest!


Sunday, June 11, 2017

A Good Math Class Discussion: Part 2

    In my last post, I talked about my presentation norms that I use in my class.  Today, I'm going to address another important part of a class discussion:  listening.  For most kids, listening is a passive activity.  It is our job to teach them to be active listeners.  These are the strategies I use to teach my students to be active listeners in class.

1.  Listen carefully.  The first one is pretty obvious and speaks for itself.  If you're not paying attention, it's hard to hear what someone else has to say!

2.  Write down questions, comments or notes.  I think we all fall into the trap of thinking that we will remember what we want to say, what question we wanted to ask, etc.. when it is our turn to contribute.  The reality is that if we jot down notes to ourselves, we are far more likely to remember things.  Making sure that students always start with a piece of paper in front of them, even if it's just a scrap of paper or a post-it, is very important in making sure that students are active listeners.


3.  Be ready to summarize what the speaker said...    This requires a focused kind of listening.  This requires that students be more ACTIVE in their listening. As students try to do this, I think it also requires them to really think about whether or not they understand the explanation that is being give.  This leads to the second half of this expectation.

4. ......or ask the speaker a question.  It was really important to me that my classroom listening norms leave room for students to NOT understand.  I always want to send the message that it is OK to struggle and not understand, as long as you're still trying and working.  At the same time, I want students to know that not understanding doesn't mean that you don't participate.  This expectations gives students a way to stay active and involved even when they don't understand.
 
5.  Think about how your strategy compares.   I want a classroom that is open to many strategies.  By comparing strategies, students can see more clearly how strategies compare.  The more students get used to comparing strategies, the more likely they can start to pick the best strategy for the given problem.

A Good Math Class Discussion: Part 1

      Good discussion is so important in class, and it supports the standards for mathematical practice.  Yet, we all know that good discussions don't just happen by accident.  Over the years, I have learned that I need to spend time teaching my class how to have a good discussion so they can really get the most out of it.  In this post, I'm going to focus on the presentation norms that I use in my classroom.

1.  Speak loudly enough for everyone to hear.   This one is pretty obvious, and yet we all have students that seem to speak at a whisper.

2.  Speak at a reasonable pace.  Again, seems obvious, but I know that students really seem to struggle with this for a variety of reasons.  For one thing, when kids get excited, they often rush when they are talking!  Unfortunately, that can really get in the way of other people getting understanding what you're so excited to share with them.

math-practice-smp6-critique-reasoning

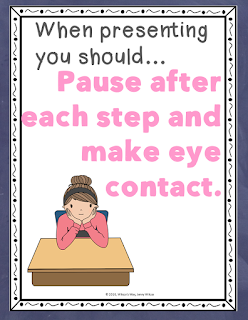
3.  Pause after each step and make eye contact.  This one goes hand in hand with speaking at a reasonable pace.  I can't tell you how many times I have had students completely lose everyone in the room (even me!) trying to explain their method.  I find that there are two common reasons why kids get lost during another student presentation.  One reason is that presenters give all of their steps at one time, and this puts everyone's brain on overload if they're still trying to process the second step, and the presenter is talking about the fifth step!  The other common reason that happens is that a student doesn't understand something early on, so they either stop understanding or stop listening.
         For these reasons, I teach kids that they need to pause after each step and make eye contact.  This way, the listeners have a chance to process what you're saying as you pause.  Hopefully, when you make eye contact it will be obvious if the people that you're talking to are lost!
       I also find that it is very important to tell my class that this helps everyone....including me.  I like having my students see that I also have to ask people to slow down, repeat a step, or answer a question to clarify their method.  I think it is so important to normalize the process of understanding, and that needing someone else to slow down does not make you "dumb".

4.  Ask for questions from the class.   This one closely follows the last one.  If you are pausing after each step, it is a natural time to let people ask questions.  Hopefully when you continue, there is a better chance for your audience to understand what you're saying now.  Also, if you have more chances for questions, there is a better chance more people will understand by the end.

5.  Show visuals.  This can help for different kinds of learners.  It is also helpful to have it as a reference throughout the presentation.

At the beginning of the year, we spend time talking about and practicing these norms.  In my next post, I'll look at the other side of the discussion:  listening norms.


Tuesday, April 25, 2017

My NCTM Experience Part 3: Number Talks

  When I saw sessions on number talks in the program,  I knew that I wanted to go to one of them.  We are planning a statewide book study for that will launch at the KATM conference next year, and the 4-10 book topic is on number talks.  I've looked over a copy of the book that we're planning to use, so I know the basic idea of a number talk, but really wanted more information about putting it into action.

       The idea of a number talk is fairly simple: you give students a problem and give them time to work the problem mentally....no pencil, no paper, no calculator.  Then have a discussion about different ways that students solved the problem.


        I was eager to try this idea in my classroom but somewhat reluctant to give up the time (isn't it always about time!).  After attending a session on number talks in middle school, I was convinced that I wanted to make this part of my classroom.  It seemed like a fairly easy idea to implement and one that could really be the center of lots of good discussions.

       The session that I went to for math talks was a good introduction.  We watched some video clips of the instructor doing number talks in a classroom and analyzed them.  One of the most helpful things that we did was practice recording the thinking of our partners.  Some of the ideas were easy to record, but others were a bit challenging.  It was definitely helpful to spend some time thinking ahead about some of the best ways to record strategies to help students understand abstract representations.

         So this week, I actually tried out a number talk for my warm up the last two days, and it was awesome!  I will definitely be incorporating number talks into my warm-ups a couple of days a week from now on.  The conversations we had around different ideas was phenomenal.   My first piece of excitement came from the wide variety of hands that I had in the air of students eager to share their strategies....and some of them were kids that definitely do NOT make a habit of raising their hand.   I have one kid that has been completely disengaged since spring break....like this kid's goal for state assessment was "To try and stay awake".....and he has had his hand in the air the last two days, sharing his ideas.  Is that not amazing???!!  :)

       The other thing that was so exciting was the huge variety of strategies.  The first problem I picked was 18 x 5, which I think was a suggestion I got from the session.  It was a great problem and it led to lots of different strategies.  Our discussion has included some of the following strategies:

  • 10*5 + 8*5 = 50  + 40 = 90
  • 20*5 - 2*5 = 100 - 10 = 90
  • (2*9)(5) = (2)(9*5) = 2(45) = 90
  • (9*2)(5) = (9)(2*5) = 9(10) = 90
  • 18 + 18 + 18 + 18 + 18 = 90
  • 18 + 18 = 36, 36 + 36 = 72, 72 + 18 = 90
  • counting up by multiples of 5
  • counting up by multiples of 5, starting at 60 since they knew that 5 x 12 -= 60
I was very pleased with this many strategies coming to the surface on our very first attempt!  And this one number talk brought up important ideas and vocabulary such as distributive property, associative property, and the commutative property.  

        So on day 2, I chose the problem 15 x 8.  I intentionally chose a problem that had an even number and a multiple of 5, hoping to encourage rearrangement of factors to get to a multiple of 10.  Again, I had tons of hands in the air and a wide variety of strategies.  As with the first problem, I had a variety of strategies used.  The most common ones were probably these:
  • 10*8 + 5*8 = 80 + 40 = 120
  • 15 * 2 = 30, 30 x 2 = 60, 60 x 2 = 120
  • 15 + 15 = 30, and there are four groups of 2 15s, so you would have 30 x 4 = 120
My favorite one, however, was the very last one of the day.  It came from a student that had already shared one strategy, and as he looked at the wall, he said, "Or you could use a clock.  The 15 is like 15 minutes, and there is 4 of those in an hour.  So it would take 2 hours to have 8 sets of 15 minutes, and I know that 2 hours is 120 minutes."  I mean seriously.....could I have asked for anything more!  What awesome, creative reasoning!

          So, after 2 short days, I am quickly a believer in number talks in the middle school classroom.  I can definitely see a ton of advantages to making these a part of my classroom from day 1 next year.

I've also gotten interested in using visual models during number talks.  I think it is a great way to introduce students to some mental models that can be very powerful, such as the area model, number lines, money and clocks (as mentioned above!).  If number talk slides that already visual models of several strategies might be helpful, check these out in my store!


Monday, April 24, 2017

My NCTM Experience Part 2: Jo Boaler

       The very first day of the NCTM conference, I was so excited about all of the sessions that I forgot to leave myself time to eat lunch.  That's not even true--I knew that I hadn't left a lunch break but I just couldn't help myself!  Jo Boaler was speaking at 12:30 and I was NOT going to miss that.  It as well worth it (and I did manage to find time to eat a quick sandwich after Jo spoke).

     Earlier this year, I read Mathematical Mindsets and it was a truly amazing read.  Listening to her talk was equally amazing.   Jo talked about many of the points from the book but I also had a few different take-aways.  Here are some of the most important points I took away from this hour.

1.  "If you're not struggling, you're not learning."--I talk a lot about making mistakes with my kids at school, and I think I have done a decent job of helping them realize that mistakes are a good way to learn.  But this phrasing helps me realize I need to take that message a step further...I need to normalize the struggle, and not just the mistakes (or right answers).


2.  "Math is not about speed, it is about depth and multiplicity of ideas."--Again, this is not a new message for me, but hearing it at this session just helped reinforce how important this is.  According to Jo, much of math anxiety onset begins  with timed tests. Interestingly, she said that math anxiety most affects the high achievers.  This matches with my beliefs....I've always been one to give kids as much time as needed.  Looking at this made me realize that although I have never really associated  speed with being good at math, this is not something that I talk a lot to the kids about.  I need to do a better job of verbalizing this message to my kids....math should be about deep thinking and understanding over speed.


3.  Teach kids to be skeptics--I love this idea.  What a great way to encourage great discussion and listening skills.  Jo gave three levels of being a critic.....convince yourself, convince a friend, and convince a skeptic.  I'm trying to figure out exactly how to incorporate this into my classroom norms for next year, but I definitely love this idea.

4.  Math freedom--This was one of my biggest take-aways.  Jo showed several clips of kids from her summer math camp, and so many of them talked about freedom being the reason that they liked the camp when they didn't like math in school.  Jo expanded on this idea into two types of math freedom:  organizational freedom and math freedom.


  • Organizational freedom included several things such as how you handle talking, sharing, recording, spending your time and movement in your room.  I'll be honest....this one gives me pause as a classroom teacher.  I understand that kids like freedom in moving around and how they spend their time....but I also know that in my classroom, structure and procedures have always been a bedrock that help my room run effectively.  I don't want to discount this idea, but I do think it is easier to do some of these things in a summer camp setting versus a regular classroom setting.  This is one I will take some time to reflect on this summer and think of ways that I can use this.
  • Math freedom included things like interpretation of problems, how kids see problems, learning new ideas, how we think about mistakes, and ideas about inquiry and creation.  I really loved this idea of math freedom....that kids begin to see math as a subject that is not just a set of rules, but there is freedom about where to start and how to proceed.  I want kids to see that math can be creative in how you think about a problem and that it needs to make sense.
I was so inspired by all of these ideas that since I've gotten back, I've taken Jo's free online course for students call "How to Learn Math for Students".  It had such great messages for students that I'm trying to figure out how to incorporate this awesome material into my classroom next year.  I also enrolled in "How To Learn Math for Teachers and Parents".  This one was not free, but I'm so excited to see what else I can learn.  I've just started the course, and I look forward to all that I will learn.

I'm already starting to have some ideas about how I want to change up some things in my classroom next year.  One definite thing is that I will be starting next year with some form of the free online course.  The other big thing I have been considering is changing up how I do homework.  I really want to make it more self-directed...I think I'll blog more about this idea later as it is still forming in my head.  I just know that I'm wanting to move towards something that is differentiated and puts it to students to examine where there are at and push themselves.